Monday, May 16, 2016
My most anticipated culinary event of the year has just been announced. The Music City Food + Wine Festival 2016 will be held September 17-18th. This weekend of food, drinks, & fun continues to grow each year, getting bigger & better, and I don’t doubt this upcoming event will be another one for the record books. Here’s a shortlist of why you should go.
(In this post I am mainly referring to the daytime Grand Taste sessions and panels. I didn’t attend Harvest Night in 2015, but I did attend in 2013 & 2014. And I had a blast!)
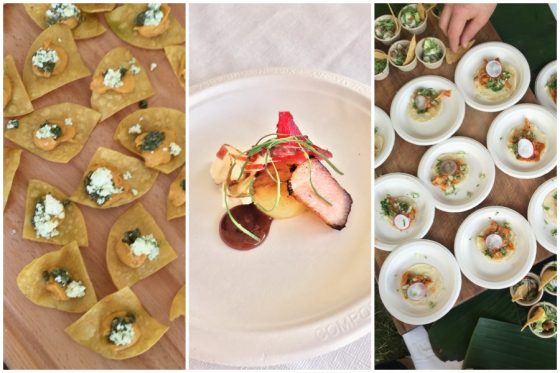
THE FOOD.
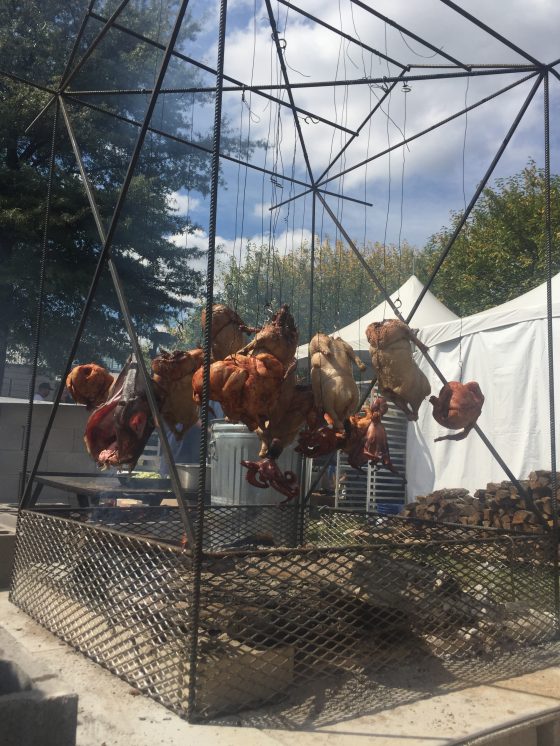
The food during the Grand Tasting is a curated pooling of the best Nashville has to showcase. I love to check out what my favorite restaurants are serving up. With Nashville seemingly opening a new restaurant every two days, there a ton of restaurants I haven’t been to. Music City Food + Wine brings them ALL to you in one spot. These restaurants do not play when it comes to the tastings, bringing impressive, flavorful, and intriguing bites. You’ll also catch bites from non-restaurant booths, past examples include Olive + Sinclair Chocolates, Bluebirds Biscuits, & Porter Road Butcher.

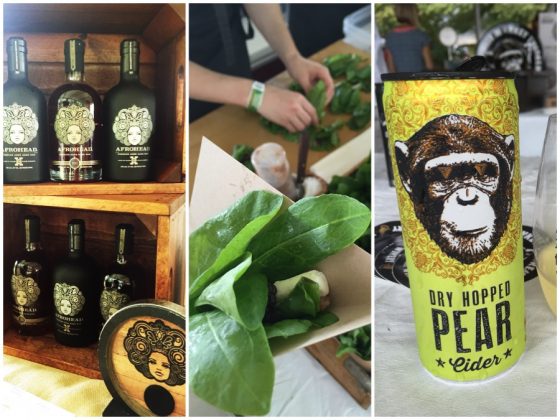
THE DRAAANKS.
I’ve attended all 3 festivals in the past, one of those years I was pregnant. I have to admit, it wasn’t *quite* as much fun attending as a non-drinker. My options were water, iced coffee, & ginger beer. If you are imbibing this is a wondrous place to be! Cocktails, wine, beer; your chosen poison is available at every turn. It’s a great place to discover new spirit brands, and especially inspiring to get ideas on cocktails you can make at home. And if you like wine, there are so many great brands there as well, far too numerous to remember them all!
THE PEOPLE.
I have to say, the crowd that attends Music City Food + Wine is a really great mixture of people mostly ranging from mid-20s to their 60s. All like-minded in that they appreciate great food and great drinks. If you follow celebrity chefs, the list for the festival this year is great, as always. It’s great seeing chefs out of the kitchen in a panel session (or in the kitchen, doing a demo!). Don’t let the word “panel” make you think this is a stuffy, boring sit down event. The panels have the feel of being invited to sit at the table with the “cool kids” and hear their stories & opinions on the food world. It’s all very relaxed and you can pop into or out of any panel at any time.
THE EXPERIENCE.
Besides seeing the big name chefs, eating the amazing food, and drinking the delicious drinks, every year the festival has been a place for me to gather with foodie friends to eat, talk, & have a good time; as well as make new friends. The festival has never felt overly crowded to me. I didn’t have to shove my way through a crowd to get anywhere. I’ve never had to wait in insane lines for a sample. In my experience, the max wait for a sample from a booth is about 6-7 people deep, but more typically just 3-4 people. It’s just enough time to finish a bite from another table, continue conversation with a friend (or make conversation with a stranger about their experience so far!), or instagram a shot for everyone who isn’t there to know the amazing time you’re having (assuming you have AT&T, because all my friends without it had a rough time getting a signal out, heh). You can attend as many panels as you want, or none at all. My favorite thing is when I just casually bump into local or regional chefs I admire. Ok, so I tend to stand there in awe and unsure what to say so I sort of say nothing… but if you are the type who is at ease conversing with someone you admire, this is a great opportunity!
THE IMPACT.
I feel the impact of attending the festival for quite some time. And I don’t mean the hangover. What I mean is, after the festival a lot of my food or drink decisions are swayed by experiences at the festival. Without a doubt the reason for me choosing to celebrate my most recent birthday at the Catbird Seat was because I was literally blown away by them at festivals in years past. (My birthday meal did not disappoint.) When I needed to pick up a dark rum for a cocktail, I went with Afrohead, after loving the cocktails they served up both days. I bought many multi packs of Infinite Monkey Theorem canned wine after the festival. Same goes for the killer iced coffee from two different vendors. It truly is a place to discover new things!
…………..

Put the dates on your calendar, September 17-18. Get your tickets. The “All-In” option is $500 and includes both tasting daytime events and the Harvest Night concert & celebrity chef tastings. If you don’t want to go “All-In” the single day tickets for the daytime events are $150, and great if you can’t attend both days, or aren’t ready to commit to an entire weekend of eating & drinking. This past year I actually did not attend Harvest Night, just the daytime events. The great thing about the day event is that the majority of the restaurants are only there for one of the two days. Sunday won’t be a repeat Saturday as far as the list of foods & restaurants you sample. Most of the beverage brands are there both days. And of course the panels are different each day. I am already salivating over this year’s event and hope to see you in September!
Sunday, May 8, 2016

When I decided to make the Korean Barbecue Burgers I knew we HAD to have thin, fast-food style fries. Then, because the burger was so easy to prepare, I thought why not do a ketchup to compliment? This ketchup had the perfect flavor to pair with the fries and burger. Everything in the recipe is a pantry staple for me except the spicy gochujang. Believe it or not I found that at Target, which is where I went before stopping at the International Market where I had planned on buying it. We’ve made these burgers twice, and both times I made a quick batch of this ketchup. It really helps round out the meal. I’m already dreaming of when I can eat it all again!


Print
Sweet & Spicy Korean Ketchup
Yield: about 3/4 cup
Prep Time: 2 minutes
Total Time: 2 minutes
Ingredients:
1/2 cup ketchup
2 tablespoons gochujang
2 tablespoons dark brown sugar
1 tablespoon soy sauce
1 teaspoon freshly minced garlic (about 1 medium clove)
1 teaspoon grated fresh ginger
1/2 teaspoon sesame oil
Directions:
Whisk together ketchup, gochujang, brown sugar, soy sauce, garlic, ginger, and sesame oil in a small bowl. Use immediately or transfer to an airtight container and store in refrigerator for up to two weeks.
Wednesday, April 20, 2016
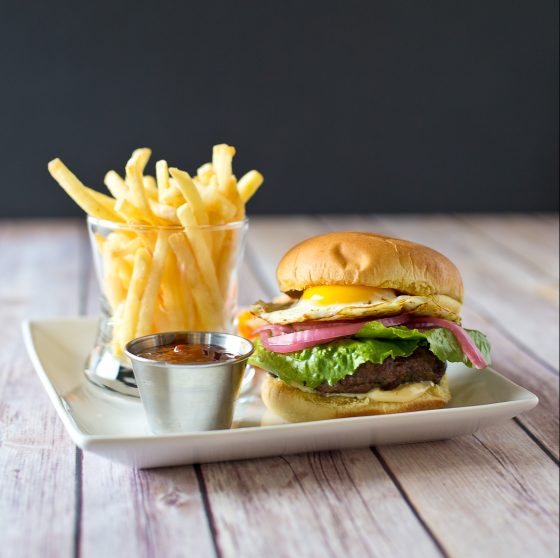
I never quite know the best way to start a post. Just start talking about the recipe because that’s what we’re here for? Tell a funny anecdote relating to the recipe? I feel like I have multiple side stories related to these burgers. But first things first, let it be known these burgers are some of the best burgers I’ve ever made. And oddly enough, the reason I found this recipe in the first place is because I was googling other recipe uses for the quick pickled red onions I had made to go with brisket tacos. We had so much left over after eating the tacos, I wanted to put them to good use and I have so say, we sure did!
These burgers have so much depth of flavor using basic ingredients. There is a slightly sweet flavor, due to caramelizing of the brown sugar in them; slightly salty flavors thanks to the soy sauce, and tons of fresh exotic aromas thanks to the scallions, garlic, ginger, black pepper, and toasted sesame oil. I had everything for the burger patties on hand already except the scallions. See? Nothing too crazy there. Toasted sesame oil is a great thing to keep on hand if you like Asian flavors. Just a little bit adds tons of flavor. One of the most important DO NOT SKIP things about this burger is the miso mayo. To make that, just combine mayo (I used Duke’s), miso paste, & sriracha. I did have to run out to the international market for miso paste, but it was totally worth it. It’s fermented so it can hang out in the back of my fridge pretty much forever, or until I run out because I’ve made these burgers so many times. It gives the umami flavor, which if you’ve never heard that term, it’s hard to explain. But once you taste this burger, you’ll get it. Combine the burger, miso mayo, a bit of lettuce, the pickled onions, and a fried egg (if you dare!) sandwiched between a slightly sweet potato bun, and this burger can’t be beat. I was surprised how quickly it all comes together. So much flavor without too much work!
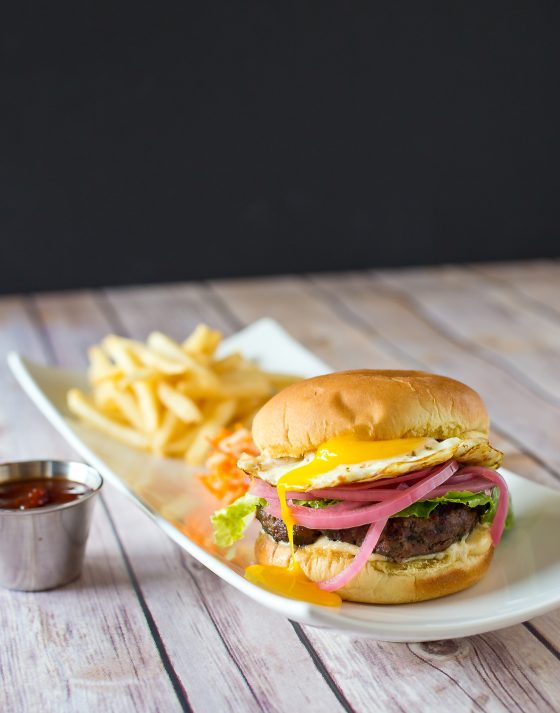
Drool-inducing drippy egg.
It’s funny that the reason I found this recipe is because I wanted to find a way to use up pickled red onions. I despise raw red onion. It ruins salads, sandwiches, and burgers. I can’t even stand the smell of my food after I’ve removed raw red onion from a sandwich. But pickle it, and I’m all about it! I like to use this super affordable & easy to use Oxo mandolin slicer to get my onions completely uniform in size. I use the widest setting. When I pickle red onion, I prefer the flavor using a mixture of white vinegar and apple cider vinegar. I personally like the hint of sweetness from the apple cider vinegar. The first time I made them for homemade bibimbap I was amazed with how much the flavor changed with even just an hour of soaking in the vinegar mixture.
Because these burgers were so easy to throw together, I had time to go in search of sweet & spicy Korean ketchup to dip our fries in. That recipe is coming next on the blog!
These burgers were made using fantastic local beef I picked up at Porter Road Butcher, raised without hormones or antibiotics. I gotta admit, it was some pretty nice looking ground beef. And I am not one to usually say that about raw meat!
I’ve made these burgers a few times now. We’ve enjoyed these cooked on a cast iron skillet, as well as grilled on a charcoal grill. Either method works great! Most recently I invited my family over to our friends’ house by offering to bring these burgers for a low-stress throw on the grill meal. Our good buddy, Wingo, loves to grill nearly every night, so I knew he would be game to cook these burgers for us. This is a great recipe for entertaining friends, because literally every single thing can be prepped well before it’s time to eat.

Thanks for manning the grill! Now hurry up and start your own blog.
Print
Korean BBQ Burgers
Yield: at least 6 burgers, we got more
Prep Time: 55 minutes
Cook Time: 15 minutes
Total Time: 1 hour 10 minutes
Loaded with flavor, and pretty simple to prepare. These burgers will be the hit of the barbecue!
Ingredients:
PICKLED ONIONS:
1 medium red onion, peeled, sliced into very thin rings, rings separated
3/4 cup distilled white vinegar
3/4 cup apple cider vinegar
½ cup water
2 tablespoons sugar
1 tablespoon kosher salt
MISO MAYO:
1/2 cup mayonnaise (I used Duke's)
2 tablespoons miso paste
1/4 teaspoon sriracha hot sauce
BURGERS
2 1/2 pounds ground beef
½ cup scallions (5-6), root end and 2 inches of green end trimmed off, finely chopped
2 tablespoons soy sauce
2 tablespoons packed dark brown sugar
1 tablespoon Asian sesame oil
1 tablespoon finely chopped garlic (2-3 cloves)
1 tablespoon finely chopped ginger root (1 1/2 inch chunk)
1/2 teaspoon freshly ground black pepper
ADDITIONAL INGREDIENTS FOR ASSEMBLY:
green leaf lettuce
potato buns, buttered & toasted
fried eggs
Directions:
PICKLED ONIONS:
Combine vinegars, water, sugar and salt in a small sauce pan. Bring to a boil. Lower heat to a simmer and cook just until salt and sugar dissolve. Remove from heat. Put onions into a medium sized bowl. Pour vinegar mixture over and stir. Allow to cool for 15 minutes. Cover with plastic wrap and put in the fridge for at least an hour and up to 3 days.
MISO MAYO:
Whisk mayonnaise, miso and sriracha. Store in the fridge up to 3 days
BURGERS:
Mix ground beef, scallions, soy sauce, sugar, sesame oil, garlic, ginger and black pepper in large bowl until just combined. Shape into burger patties. Grill for about 6 minutes per side over medium-high heat for medium rare. Toast the buns for a minute or so. Spread miso mayonnaise on the bottom of the bun. (It is my personal belief that sauces on burgers should touch the meat and not just toppings and bun. I think it brings flavors together. Umami baby.) Serve burgers, topped with pickled onions and lettuce leaf.
Sunday, April 17, 2016

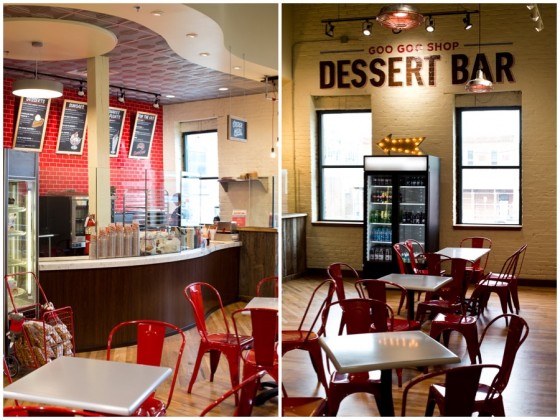
I’m a huge fan of Goo Goo Clusters. You may remember my Peanut Butter Pie topped with peanut butter Goo Goo Clusters. If not, you should. Well some time ago they opened a retail location in downtown Nashville. I love to go pick up some of their ultra special, ultra delicious Premium Goo Goos. Earlier this year they expanded and opened a dessert bar. How genius is that? How many times have you just wanted to stop in somewhere for dessert?
I got the chance a while back to sample some of their offerings. And holy sweet tooth Batman, they’ve got some GOOD stuff!
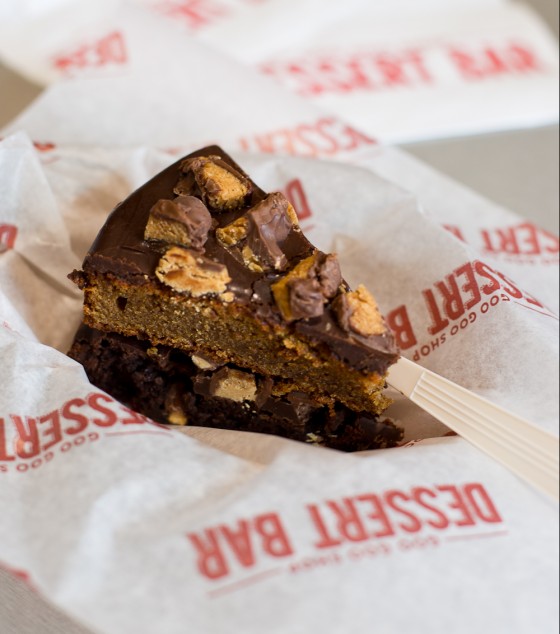
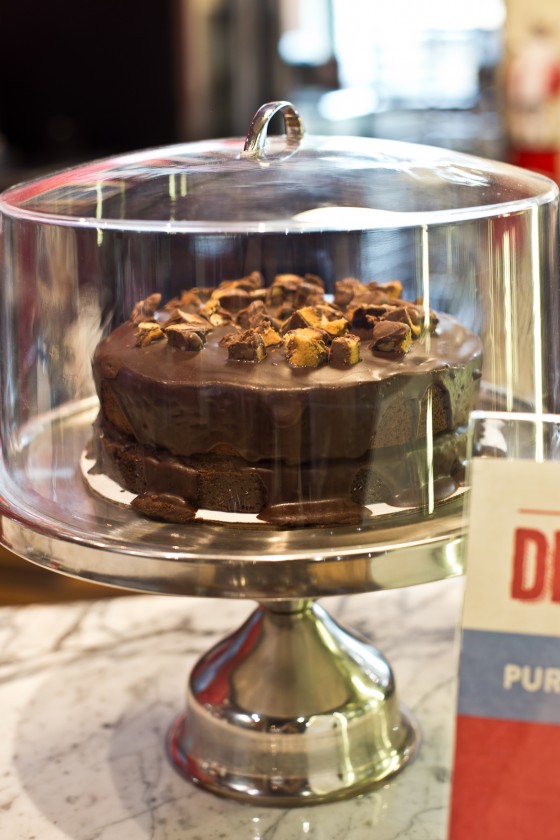
3rd Avenue Heartbreak (above & below) – flourless chocolate cake and peanut butter cake, chocolate sauce, and peanut butter Goo Goos!
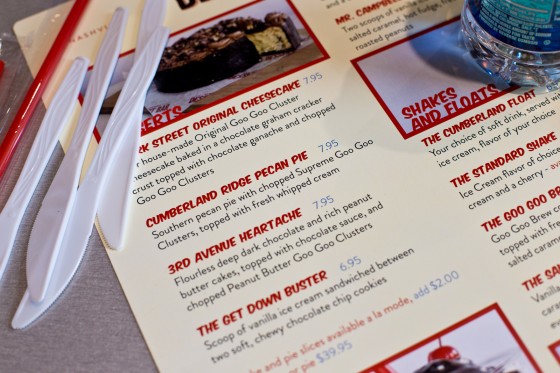

Crazy decadent milkshake!

My hands down favorite was the Cumberland Ridge Pecan Pie (above & at the top of the post). Maybe because my favorite Goo Goo is the Supreme, featuring pecans, or maybe because this pie was just SO good!
On another recent visit my friend and I shared a slice of the cheesecake and it was perfection. That chocolate graham crust was a great base for the rich cheesecake. It was rich without being overly sweet.
The shop recently began serving lunch. Sandwiches, salad, and soup are their offerings. While simple, they don’t lack flavor. I’ve only tried the grilled pimento cheese, but it was perfection. I can see myself going back and ordering it again and again. It was rich and creamy with just the right touch of spice. Oh, and the fruit salad I ordered tasted just like something perhaps your grandmother would make. It wasn’t just fruit thrown together, but it had a slightly sweet sauce to coat it.

If you find yourself downtown, check it out! I feel like I’m often asked by out of town visitors where to go in Nashville. And this spot is definitely on my list!


