Thursday, March 12, 2015
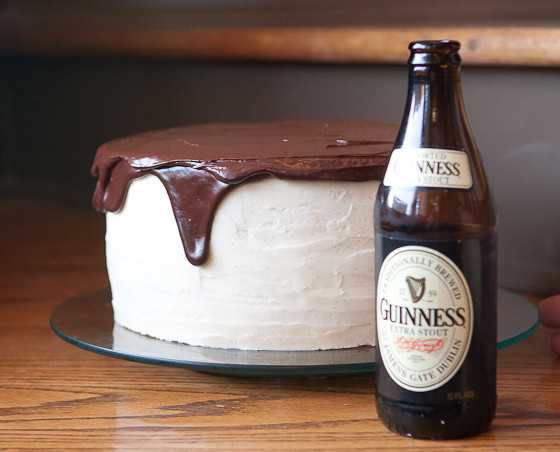 On one hand I’m giving you this cake recipe really late (as in I made this cake in March of 2014), but on the other hand I’m giving it to you just in time for all your St. Patrick’s Day-Guinness beer fueled celebrations. Nathan turned 40 in March of 2014 and wanted an epic birthday. We did a fabulous fancy affair catered by Karl of Biscuit Love, with a whole hog, spicy greens, & roasted potatoes with Alabama white sauce. Of course an epic dessert is needed to top off that fantastic meal, and this cake was it. In case you don’t remember me mentioning it, Nathan is a “craft beer nerd”. Sometimes I feel like our lives revolve around beer. I refer to myself as a “craft beer widow”. His party was a huge, hours-long craft beer tasting party. So the cake needed to be beer themed. Using recipes from various sources I put together this cake and I must say I was quite proud of my newest cheesecake cake!
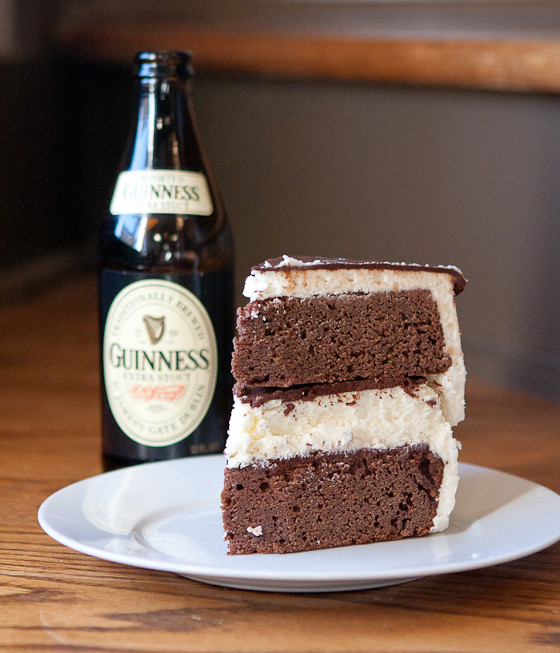
The cake itself was not too sweet, which served as a good counterpoint to the rich cheesecake, light & sweet frosting, and dark, rich ganache. The Guinness flavor is subtle, and is perfect for an adult palate. It was a certain hit at the party! If you’re unfamiliar with these cheesecake cakes, I’ve been doing them since 2010. I figured out that if you make the cheesecake ahead of time & freeze it, it’s easy to transfer & assemble between the cake layers. They aren’t necessarily difficult, but they are time consuming. I like to make the cheesecake the weekend before and freeze it. Friday night I make the cake. Then Saturday all I need to do is make the frosting and assemble. (That’s assuming you’re going to serve it on a Saturday.) Breaking up the components into different days makes it much less daunting. I love coming up with new combinations & variations. The possibilities are endless!
Here are a few of my past ones:
Lincoln’s Red Velvet Cheesecake Cake
Chocolate Peanut Butter Cheesecake Cake
Oreo Cheesecake Cake
And, my friend Jen at Beantown Baker has done some awesome variations after trying mine. Here’s some of hers:
Neapolitan Cheesecake Cake
Carrot Cake Cheesecake Cake
Some tools I find helpful for making cheesecake cakes (and cakes in general):
Wilton Bake Even Strips
Nordic Ware Cheesecake Springform Pan
Wilton Angled Icing Spatula
(Click Read More for the recipe!)
Read more
Tuesday, February 10, 2015

From my house I can see both a grocery store AND the Farmer’s Market. And yet… I’ve really been slacking about buying and cooking vegetables. I can blame it on the fact that I have two kids, I can blame it on the fact that one kid hardly eats vegetables, I can blame it on poor planning, work/life in general, etc. But it’s time I get back on the veggie train. I have always loved eating vegetable filled meals, so I’ve really been missing out. Recently I got the offer to try a new grocery delivery service, Green Bean Delivery. It came highly recommended from a foodie friend who has the service in her area.
Green Bean Delivery is one of those services that deliver a box of customized items to your door. Unlike the clothes or beauty products service, this is a bin YOU can completely customize before each delivery. You can schedule & skip deliveries at your convenience. There’s no sign-up/membership fee, delivery is free, and they offer high quality, local when they can, organic stuff. Here’s a great info page.
And, here’s a promo code for your first order: bc6effi It expires 3 months from today so you have until May 10th to use it!
I was actually home on the day & time my first delivery came. I was so excited! When I opened up my first bin I was quite impressed with the quality of all the produce. Everything was picture perfect and tasted great! Our first night we roasted broccoli. Roasting is my default for veggies. There’s a rare vegetable that doesn’t taste delicious with a little EVOO, salt + pepper! I had to steam a few stalks of the broccoli for my picky 2 year old, BUT HE TOOK 3 bites! Monumental. Also of great success were the rainbow baby carrots. I took them out to show my husband, not expecting Elliott to care, and both guys were quite excited about them! Elliott even ate a baby carrot. Seriously, the kid rarely eats vegetables and already he’s ate two from my bin! Nathan even said “If you kept these on hand, I’d snack on them during the week.” So there you have it, I’m sold.


(Most produce came wrapped in paper bags, I unwrapped everything for this “display” photo)
In my first bin I also had a wide selection of fruits, including bananas, pears, apples, oranges, kiwi, avocado, and more vegetables like bok choy, green beans, as well as grocery items like bulk organic rolled oats. I eat a lot of oatmeal, and I like to buy it in bulk when I can. I was also really excited to see they had some Bourbon Barrel Foods items on sale the week of my first bin. I love their bourbon barrel soy sauce, so I was excited to purchase some bourbon barrel vanilla and bourbon barrel smoked sea salt. This KY-born girl was happy.
My offer to review this only included my first bin delivery, but I enjoyed it so much I’ve decided to continue the service. In this week’s bin I’ve ordered more of those baby rainbow carrots, along with brussels sprouts (a favorite for us!), and even a loaf of bread from Nashville’s Provence bakery. What works best for me & my family would be a delivery about every other week. That’s how I’ve done CSA’s in the past. One big difference between this and a CSA is that I can suspend deliveries at any time.
DON’T FORGET ABOUT THE COUPON CODE! ENTER bc6effi to get $15 off your first order.
And now for this super easy appetizer recipe! This past weekend was the Nashville Food Bloggers potluck party. In thinking about parties from years past, I remember lots of desserts, and lots of rich, savory bites. Therefore, I thought I might try to contribute something light & fresh. I knew I had some pears from my Green Bean Delivery, and I wanted to utilize those. I ended up on this incredibly simple & tasty appetizer. All it includes is a slice of pear, a slice of brie cheese, and some arugula lightly dressed with a lemon thyme vinaigrette wrapped up in a slice of prosciutto. Seeing as I’m often hard-pressed for time these days, the simpler the better! While these are simple, they are quite flavorful. I got a lot of compliments, and this is a crowd that knows food!

Print
Pear Prosciutto Bundles
Yield: 16 appetizers
Prep Time: 15 minutes
Total Time: 15 minutes
Ingredients:
1 bunch arugula leaves
2 ripe bosc pears
4oz brie cheese
2 lemons
1 tablespoon fresh thyme leaves, finely chopped OR 1 teaspoon dried thyme
3 tablespoons extra-virgin olive oil
16 slices prosciutto di Parma
Salt and freshly ground black pepper
Directions:
In a medium bowl whisk together extra virgin olive oil, thyme, the juice from one and a half of the lemons (reserve the remaining half), and salt & pepper. Add in the arugula leaves and toss to combine.
Quarter the pear lengthwise and remove the core. Cut into quarters and then in half again. Squeeze the remaining lemon over the pears.
To assemble lay down a piece of prosciutto followed by a pear slice, a slice of brie (about equal in size to the pear slice), and top with the dressed arugula. Roll up tightly. Repeat steps for remaining ingredients. Top with a sprinkle of freshly cracked pepper.
Thursday, January 15, 2015
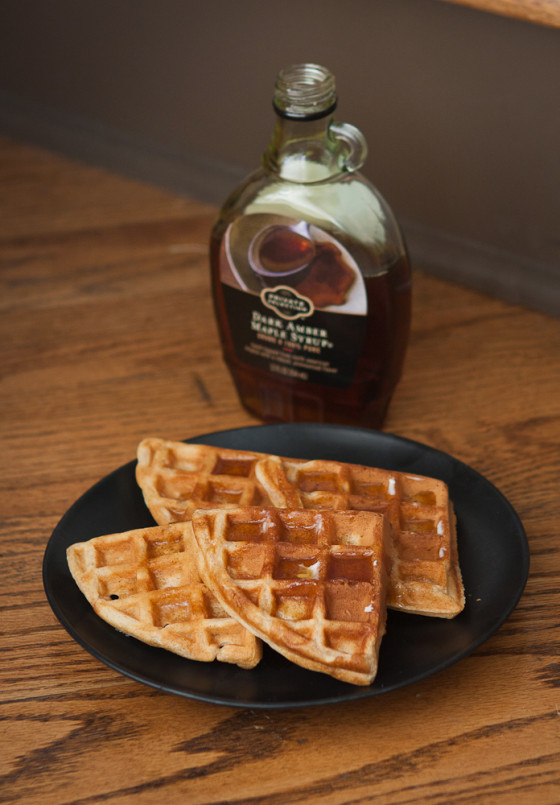
My husband didn’t grow up with the notion of “breakfast for dinner”. When I first introduced this idea to him he thought it was crazy. Perhaps it was my dad’s home cured & smoked bacon, along with breakfast sausage he ground, but Nathan has finally come around to it! Also adding to the appeal, is that our super picky 2 1/2 year old loves waffles & pancakes. The Monday after we returned from being out of town over Christmas I had planned on waffles & sausage for dinner because I knew we had all of the ingredients without needing to go to the store. What I forgot in this plan was that my go-to waffle recipe is this Overnight Yeasted Waffle. Luckily I found this perfectly suitable recipe in a cookbook for those times when I don’t happen to have the time & foresight to prepare the overnight version.
We found that we enjoyed these just as much as the other recipe. It’s always nice to add another recipe to my arsenal of breakfast favorites!
Print
Classic Waffles
Yield: 4 servings
Ingredients:
2 eggs
1 3/4 cups buttermilk
1/4 cup canola oil
1 1/2 cups all purpose flour
1 Tablespoon sugar
2 teaspoons baking powder
1/2 teaspoon ground cinnamon, optional
1/2 teaspoon baking soda
1/8 teaspoon fine sea salt
Directions:
Before you start, preheat a waffle iron according to the manufacturer's instructions. Also, preheat oven to 275, to keep waffles warm after cooking.
In a large bowl, whisk the eggs until evenly mixed and frothy. Ad the buttermilk to a large glass measuring pitcher and then add the oil. Pour the buttermilk-oil mixture into the bowl with the eggs and whisk until blended.
Add the flour, sugar, baking powder, cinnamon (if using), baking soda, and salt and mix just until any large lumps disappear (small lumps are fine).
When the waffle iron is hot, pour enough batter for 1 waffle evenly over the grid, easing to toward, but not into the corners and edges with a wooden spoon or silicone spatula. Close the waffle iron and cook until it opens easily or according to the manufacturer's instructions, usually about 4 minutes. The waffle will be golden brown when ready. Keep warm in the preheated oven while you repeat with the remaining batter.
Monday, December 22, 2014

This is very last minute, but Monday night I had the pleasure of going to Ham & Jam at The Sutler. We had such a great time I wanted to share about it! Elliott came as well and enjoyed the music, fun, & the food too! (And he’s such a picky eater he rarely eats food at restaurants.) Ham & Jam is a prix fixe dinner complete with fun country & western Christmas music, a really cool setting, great food, & even a special guest (hint: red suited fellow).

There’s one more night of it, Tuesday December 23rd. Tickets are $40 (gratuity included). There’s a 6:30 and 8:30 seating, but call for reservations as I think the 6:30 may already be at capacity. It was really great to go to a kid friendly spot that also has amazing food.
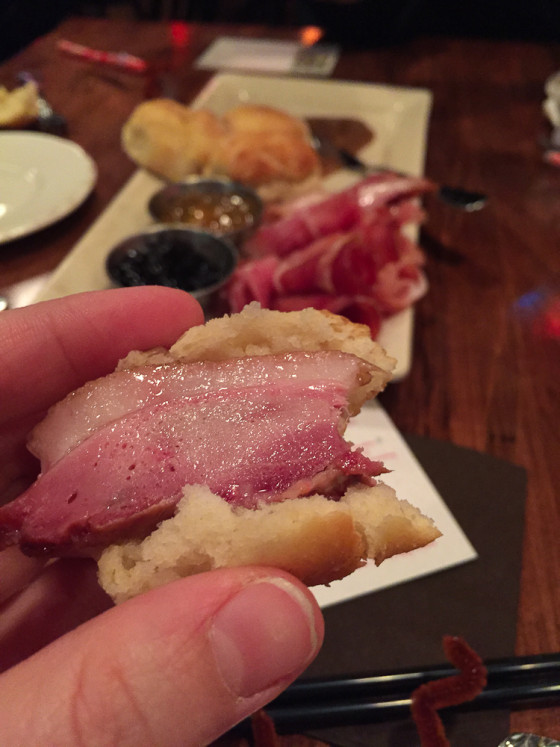
 Ham & Jam plate to get things started! I’ve never had smoked apple butter before, nor have I had house cured duck ham. All so delicious!


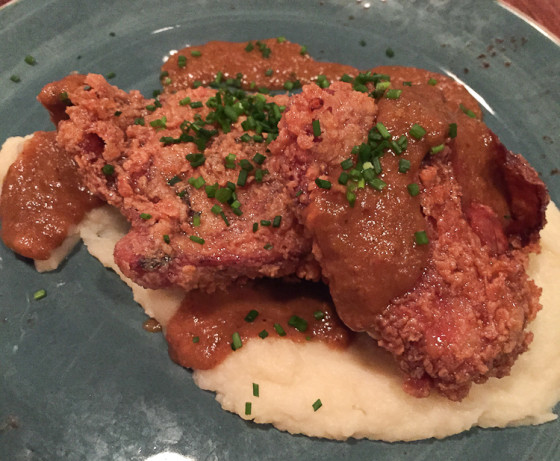
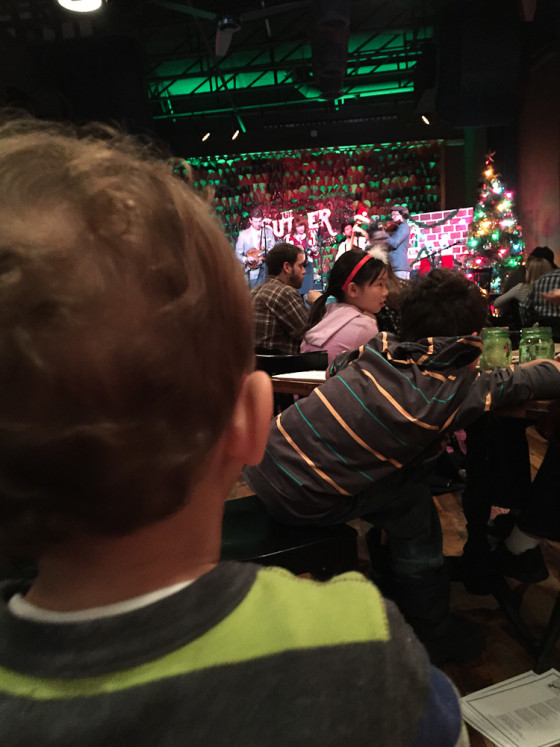
Elliott loved the music, clapping and saying “Yaaaay!” after each song. For a video of him jamming, check out my instagram.

*Drinks not included, but worth every extra penny when dining with a toddler.*


 On one hand I’m giving you this cake recipe really late (as in I made this cake in March of 2014), but on the other hand I’m giving it to you just in time for all your St. Patrick’s Day-Guinness beer fueled celebrations. Nathan turned 40 in March of 2014 and wanted an epic birthday. We did a fabulous fancy affair catered by Karl of Biscuit Love, with a whole hog, spicy greens, & roasted potatoes with Alabama white sauce. Of course an epic dessert is needed to top off that fantastic meal, and this cake was it. In case you don’t remember me mentioning it, Nathan is a “craft beer nerd”. Sometimes I feel like our lives revolve around beer. I refer to myself as a “craft beer widow”. His party was a huge, hours-long craft beer tasting party. So the cake needed to be beer themed. Using recipes from various sources I put together this cake and I must say I was quite proud of my newest cheesecake cake!


