Friday, May 1, 2009
I’m so excited to share with you all some very exciting news! There will be some ch-ch-changes coming to Erin’s Food Files! The first bit of news is I have been “adopted” by a more experienced blogger who will be giving me tips & pointers on how to make my blog better. I found out about this opportunity on a blog I read called Dine & Dish. I think it’s a great thing she’s doing, pairing up experienced bloggers with newbies.
I’ve been paired up with I♥food4thought. When I first found this out I was excited, and I checked out her blog. It looked somewhat familiar. She also mentioned she had another blog, i♥cuppycakes! Oh, now THIS was a blog I was familiar with! I’ve even made one of her recipes! I’m thinking this is going to be a good pairing, as she loves cupcakes, and she loves putting alcohol in cupcakes. Something we all know I enjoy, as can be seen in the Caramel Rum Cupcakes, the recent Mint Julep Cupcakes, Bananas Foster Cupcakes, and of course, the ones I made from her blog, Malibu Strawberry Lemon Cupcakes! I think this should be a great learning experience. I have lots to learn, and lots of questions!
The second bit of good news is, I’m about to get an equipment upgrade. If you’ve been reading my blog, you know sometimes you get gorgeous photos of food, like in the Orange Bundt Cake, or the Wasabi Chex Mix, all taken by yours truly. BUT, yours truly is also known to bring you such bad pictures like the ones in my posts about Chocolate Cookies with White Chocolate Chips, or Garlic Rosemary White Bean Dip. The difference here has always been the camera, not the photographer. I own a point and shoot, and it works great for fun trips with my friends & stuff like that. But my dad owns a Canon 40D. 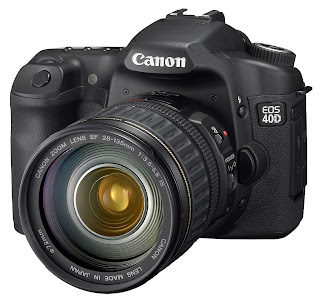
I borrow that as often as I possibly can. I’ve been wanting one for a LONG time. Since before I even had a blog. Pretty much since the day he got it. As it happened, this year I got a tax return, a pretty sizable one. I’ve had my eye on finally taking the plunge and buying the camera. My dad is also a hard-core eBay addict. So I set him to task. I told him to just find me what he thinks is a good deal on the camera, and buy it. Then I’ll pay him for it. We did the same thing when I bought my car (an ’07 Jetta I got in 2007 for a STEAL OF A DEAL). And believe me, I pay my dad for 100% of it. And I think I even pay him a finder’s fee. My dad, he’s a business man, and a cheapskate, so no handouts here! My dad enjoys buying things on eBay in the same crazy manner that I LOOOOOOOOOVE leisurely shopping at Publix, Kroger, or Whole Foods.
I hope to have the camera when I go home for Mother’s Day, and I just can’t wait! I’m thinking I might also finally take the plunge and make or get a lightbox. I have ZERO direct natural light that comes in my apartment. There is a small window of time around 10:30-12:30, where light will bounce off the neighboring brick wall, so I can sometimes get photos then. Either way, it still sucks. And I know I’m capable of more.
I don’t want to write a post without photos, so here are some of my favorite shots of me growing up, involving food!
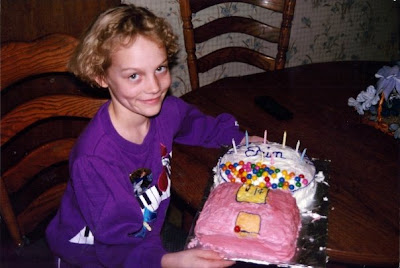
Bad bangs, band perm, questionable choice of attire; awesome cake. My mom rocked it out that year.
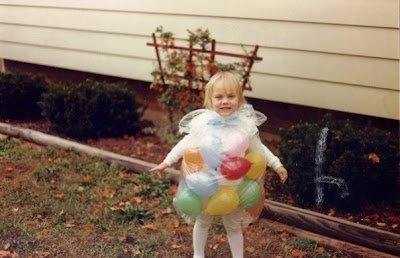
Bag of jelly beans. Such an awesome costume, I asked to do it again in 2nd grade. Nowadays, I’m sure people would be all up-in-arms about tying a plastic trash bag around a child’s neck; but it’s WAY cute, so what’s the big deal?
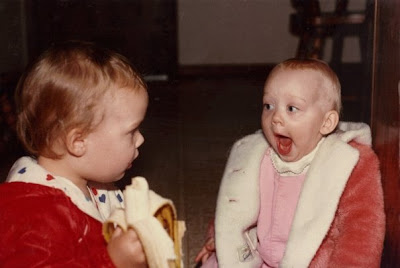
This photo pretty much sums up my existence. I pretty much ALWAYS want a bite of your food. It’s a given, but at least we know it started early.
Friday, May 1, 2009
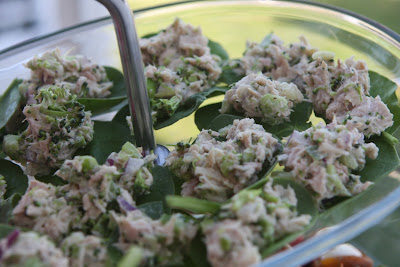
This was another appetizer I saw and instantly bookmarked, waiting for the perfect party to make them. We were celebrating my friend’s birthday, and decided to eat at home before heading out for other *ahem* respectable adventures. This is an incredibly simple appetizer, I can’t believe I’ve never thought of it myself! I really liked the healthy additions of broccoli and the other veggies in the tuna salad. I forgot to add the red wine vinegar the original recipe calls for, but it tasted great nonetheless. I just sort of began to make it the way I usually do, adding in green pepper, because I always put that in my tuna salad. Also, because I was making this for a party, I tripled some of the ingredients in the original recipe (but I didn’t triple the onions, as I felt that 1/4 of a cup was PLENTY), and that is what I have posted below.


Print
Mini Tuna Salad Wraps
Ingredients:
3 cans light tuna in water
3/4 cup chopped celery
1/4 cup chopped red onion
3/4 cup chopped broccoli florets
1/2 cup chopped green pepper
1/3 cup light mayonnaise
3 tsp red wine vinegar (I accidently omitted)
fresh pepper
celery salt (optional, I didn't add it this time, as my friend didn't have any, but I always add it to my tuna salad and it adds a great flavor)
Directions:
Drain tuna. Mix all the ingredients and serve in freshly washed spinach leaves.
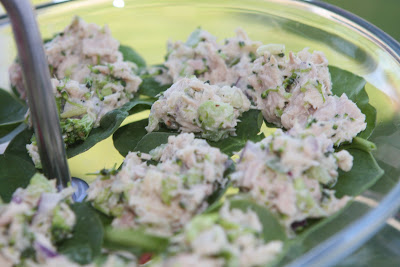
(Could it get any easier?)
Wednesday, April 29, 2009
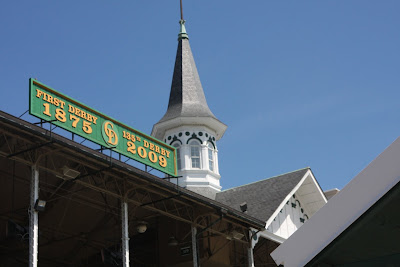
I may live in Tennessee now, but I lived a full 22 years of my life as a Kentuckian. You can’t live in Kentucky, and not be aware of the Kentucky Derby! The Kentucky Derby is the first leg of the Triple Crown horse races. It’s known as the “Most Exciting Two Minutes in Sports”, and is the oldest continuous sporting event in the United States.
I grew up surrounded by traditions leading up to the race. In elementary school we would make our own stick horses, decorate “silks” (construction paper vests), and then at the end of the week we’d have our own races. I also remember, come Derby Day (first Saturday in May), my parents and my brother & sister would watch the races on TV, and my parents would give us quarters to make our bets. I always chose the horse with the neatest sounding name. I always lost. Still to this day I get chills of excitement come race day when I hear the playing of “My Old Kentucky Home”.
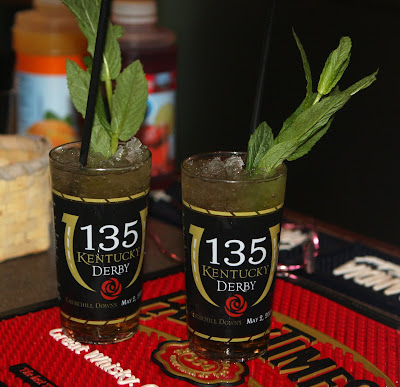
It’s such a fun tradition, with the festive hats & festive drinks. The festive, traditional drink served at the Derby is a Mint Julep. It consists of bourbon (Early Times is the offical bourbon, but I had Maker’s Mark on hand), mint leaves, and sugar or simple syrup. I happened to get the chance to go to Opening Day, where I had my VERY FIRST, Mint Julep, and I got a commemorative glass for this year’s race.

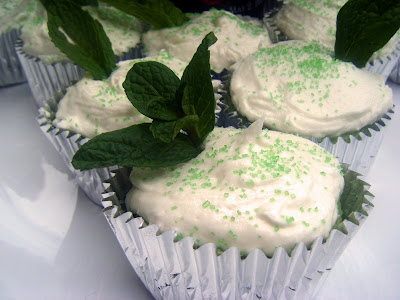
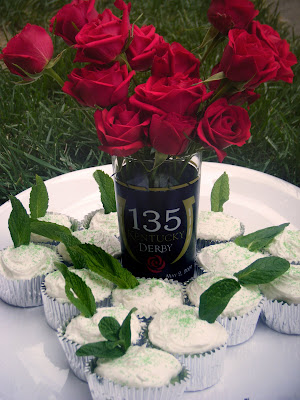
I’ve had my eye on these cupcakes since before Derby last year. I finally made them this year and I’m SO glad I did. I took them into work, and they were gobbled up VERY VERY fast! Not just that, but lots of people seemed to go out of their way to tell me how good they were! While the cupcakes didn’t capture the TRUE flavor of a Mint Julep (think LOTS more bourbon!), they certainly were inspired by it.

As a bit of advice warning, I have heavily re-written the original cupcake recipe from it’s source. For one thing I halved it to make closer to a dozen. And for another, the original recipe calls for the eggs, but never mentions when to add them! Luckily, for some reason I felt something was off, and I did a “test batch” of two mini cupcakes and discovered this mistake. And the frosting recipe I changed up quite a bit too, adding bourbon to that, as well as using softened butter, instead of melted, as I’ve NEVER seen or used a frosting recipe that required melted butter, and I just didn’t feel like chancing it this time!
Print
Mint Julep Cupcakes
Ingredients:
CUPCAKES:
1/2 cup butter
1 cup sugar
3/4 teaspoons vanilla extract
1/4 teaspoon mint extract
2 eggs
1 1/3 cups flour plus 1 Tbsp
1 1/2 teaspoons baking powder
1/2 teaspoon salt
1/2 cup milk
1/4 cup bourbon (I used Maker's Mark)
1/4 cup Creme de Menthe
FROSTING:
1 1/2 cups sifted powdered sugar
1/4 teaspoon salt
1/2 teaspoon mint extract
1/2 teaspoon vanilla extract
1 teaspoon bourbon
1/2 stick unsalted butter
1 Tablespoon vegetable shortening
milk
Directions:
CUPCAKES:
Preheat the oven to 350F, and grease or line cupcake cups.
In a large bowl, combine the flour, baking powder, & salt. Set aside.
In the mixer bowl, cream together the butter and sugar. Add the eggs one at a time. Once the eggs are combined, add the extracts. Slowly add in half of the flour mixture. Add the milk and liquors to the batter, then the rest of the flour. Mix as little as possible, just until the batter comes together.
Divide evenly among the cupcake cups. Bake for 15-18 minutes, or until a toothpick inserted in the center of a cupcake comes out clean. Let cool.
FROSTING:
Whip the butter & shortening using the whisk attachment (if available). Slowly add in half the powdered sugar. Add in the extracts & bourbon. Add the rest of the powdered sugar. Then slowly add in milk until frosting reached desired consistancy.
Once cupcakes are completely cooled frost, and top with mint leaves (optional, for decoration!).
Tuesday, April 28, 2009
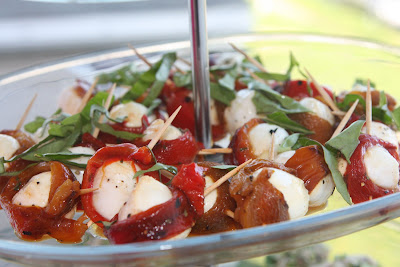
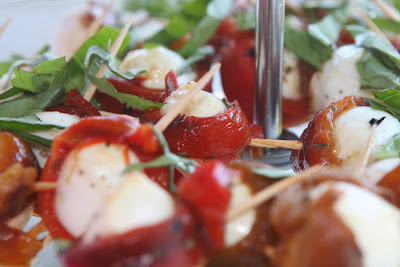
I saw these appetizer beauties on Tastespotting, and instantly bookmarked it because I LOVE roasted red peppers, and I love mozzarella. This was such an easy, yet delicious appetizer to prepare, I recommend it next time you throw a party! You could easily just use red peppers. At the store I shopped, the red peppers were much larger than the yellow ones; and after roasting, I had a hard time wrapping some of the yellow peppers around the mozzarella. Plus, every once in a while, you can catch red peppers on sale, which is more the reason to make them! I roasted, peeled, and cut the pepper strips the night before, so this was easy to prepare come party time, especially if you’ve got a lovely lady named Violet helping out!
Print
Roasted Pepper and Mozzarella Bites
Ingredients:
2 bell peppers, one yellow and one red
1 tub fresh mozzarella, preferably the cherry sized
olive oil
salt and pepper and/or seasoning that you like
3-4 fresh basil leaves
Directions:
Set oven to broil. Line a baking sheet with foil. Place the whole peppers on the foil and place under broiler. When the tops of the peppers have turned black, take tongs and rotate peppers. Keep turning peppers until the skin is completely charred. Place peppers in a brown paper lunch sack or in a large zip lock bag. Close. Let steam for 10 minutes. Remove peppers to a cutting board and let cool.
After peppers have cooled, skins will slip off easily. Remove all skins and then cut peppers in half, removing stem carefully so peppers don't tear. Remove seeds carefully. Slice each pepper half into about 5 or 6 strips. Season pepper strips.
Drain 20 to 22 mozzarella balls. Place mozzarella in small bowl and drizzle some olive oil on them. Sprinkle some salt and pepper and/or your seasoning (don't be skimpy with the salt) and toss.
Take each mozzarella ball and wrap with a strip of pepper. Secure with a toothpick and place on serving platter. Repeat with remaining peppers and cheese. Slice some fresh basil, if you like, into chiffonade and sprinkle over the appetizers.


