Thursday, November 12, 2009
HAPPY BIRTHDAY TO ME!!!!
Don’t be confused, these aren’t gifts I’ve received, these are gifts I’m giving away to YOU!
If anyone knows me in person, they’ll testify that I *love* giving gifts to other people. I honestly would prefer to pick out gifts for other people than I would receive them! (That’s not to say I don’t accept any gifts that come my way of course!) And so, to celebrate my 26th birthday, what better way than to give something to you guys?
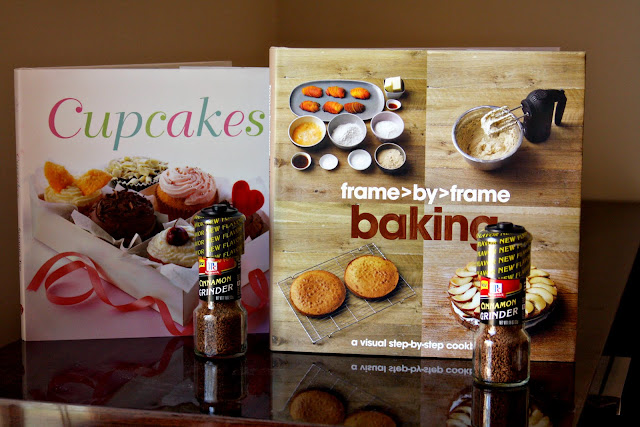
It’s not much, but I picked up two cute little cookbooks, and two of the McCormick’s Cinnamon Grinders I love so much. You may remember me going on and on about them in my Banana Cinnamon Waffles post (I just made these again this past weekend too), or in my Crockpot Applesauce. I swear this cinnamon makes such a noticeable difference. I’ll pick two winners, and each will get a cookbook and cinnamon grinder. I’m just so thankful for everyone who spends a couple seconds or minutes of their week checking out my blog! And extra thankful to everyone who leaves me comments. And extra extra thankful and thrilled when you guys tell me you’ve tried a recipe I posted! I’ve just been so amazed at how my readers and followers have grown! THANK YOU THANK YOU!


Two quick shots of the Frame by Frame Baking cookbook, with cookies, bread, muffins, and more! If you’re a fan of lots of pictures, you’ll love this!

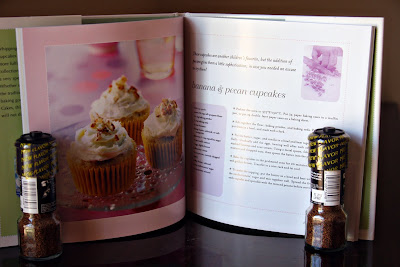
And the cute little cupcake book. This one doesn’t have a ton of recipes, but all the ones in here look great!
I was lucky enough to have a my friend at work bake me this AMAZING Starbucks VIA Chocolate Chip Banana Bundt Cake as an early start my birthday week. HOLY COW! It sure was a great way to start off my Monday morning!! Thanks Liesl!
And last year I celebrated with this Oreo Cake, which was incredible, and totally tasted like a big fat Oreo! Now, I’m not completely set on what I should bake for myself this year… So, to win:
Leave me a comment, and tell me WHAT WAS YOUR MOST RECENT BIRTHDAY CAKE?
And, for a second chance to win, if you Tweet about this giveaway, leave me a comment with the link to your tweet.
Now for some rules and other stuff:
– EITHER LEAVE YOUR EMAIL ADDRESS IN THE COMMENT, OR MAKE SURE THAT I CAN EASILY FIND YOUR EMAIL ADDRESS IF YOUR NAME LINKS TO YOUR BLOG. If I can’t reach you, I can’t give you your prize!
– This is ONLY open to US residents. One comment plus one tweet per person please!
– Contest Ends Sunday, November 15 at 12am PST. Winners announced Monday morning.
– I purchased everything in the giveaway with my own money, and am in NO WAY affiliated with McCormick’s or the publisher’s of these books.
Wednesday, November 11, 2009
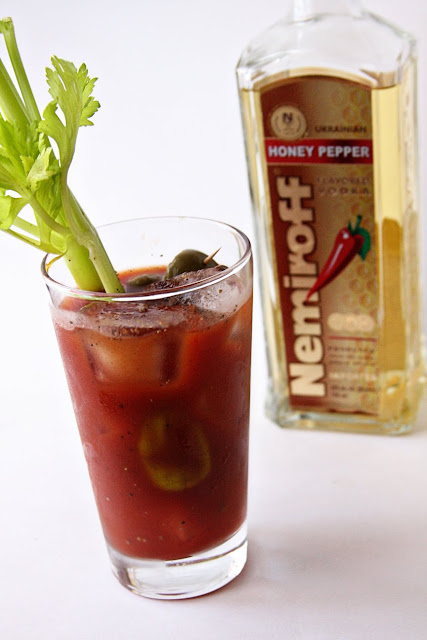
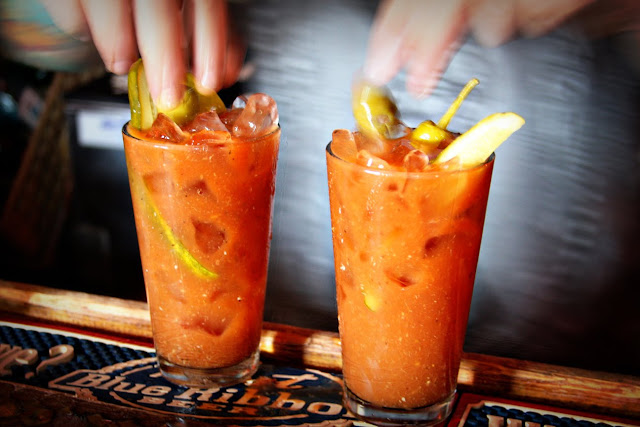
I’m calling this “Bloody Mary Pt1” because there WILL be a part two. I think there are two components to making a killer Bloody Mary, one is some good vodka, and the second is a good bloody mary mix. We’ve mastered the good vodka. In August, as we have the previous 2 years, we attended the East Nashville Tomato Arts Festival. I could try to explain it… but I won’t even try. Just check out their site, and if you’re a Nashvillian and you’ve never been, you’re really missing out. This year’s Tomato Arts Fest happened to be on a HOT HOT HOT day. The minute we parked (Thanks Travis!) and walked over to the festivities, we were like “DAMN we need some A/C and a drink!”

(This the The Boy sporting his “fro-hawk” as I like to call it.)
After I forced The Boy to let me stand in line for some free Tomato Basil Gelato and souvenior screenprint reusable grocery bag from Whole Foods we made our way over to one of our favorite East Nashville bars, Red Door East.

I wasn’t planning on drinking a Bloody Mary. To be perfectly honest, with my acid reflux, I usually can’t handle the acidic tomatoes PLUS the vodka for more than a few sips. Even if I DID double up on my omeprazole that day!
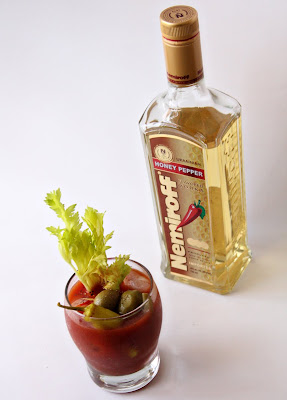
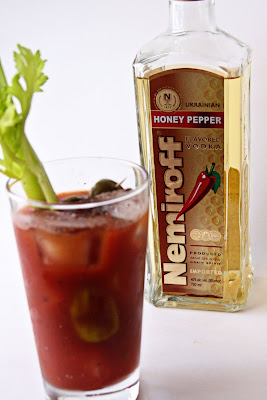
But while we were cooling off, someone down the bar ordered a Bloody Mary, and I saw the bartender reach for a golden bottle. I had to ask him “Are you putting tequila in that?!” And he showed me the bottle and explained it was a Ukranian Vodka, Neimeroff, their Honey Pepper variety.
Alright, that’s it! Interest piqued! I nudged The Boy, who was sipping a beer, and asked if he wanted to share a Bloody Mary. He was intrigued too, so I asked the bartender for ONE Bloody Mary. He fixed us two. At first I was mad, there’s no way I could drink the whole thing!
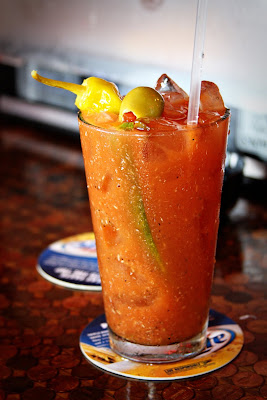
After I took my first sip I realized, this man knew what he was doing!! The Boy would of had to pry it outta my hands if he wanted a sip. 😉 Best Bloody Mary ever. It was smooth, and balanced, with the kick of the alcohol. Mmmm… A salad in a glass right there!

We sought out the vodka, and found it at one of our favorite liquor shops in town. I bought some organic vegetable juice, and left the recipe searching up to The Boy. Here’s the basic recipe he followed:
We like to mix these up on Sundays during football, because, unlike Saturday, The Boy doesn’t have to go into work that day! Stay tuned, as I said there WILL be a Part II to this story. One day soon, we’ll learn how to make our own Bloody Mary mix. Then I have a feeling we’re going to get lots more guests wanting to come over for Sunday visit! 😉

Print
Bloody Mary
adapted from DrinkMixNet
Yields 1
Ingredients:
1 1/2 ounces (1 jigger) vodka (we recommend Nemiroff Honey Pepper Vodka)
1/2 cup tomato juice
2 teaspoons fresh lemon juice
Worcestershire sauce to taste
Tabasco to taste
salt to taste
fresh cracked pepper to taste
1 celery stick for garnish
1 olive for garnish
1 banana pepper for garnish
Directions:
Combine the vodka, the tomato juice, the lemon juice, the Worcestershire sauce, the Tabasco, 1 cup ice cubes, and salt and pepper to taste, shake the mixture well, and strain it into a tall glass filled with ice cubes. Garnish the Bloody Mary with the celery stick, olive, and banana pepper.
PS. This time last year I was making a dish I like to make every fall, Cranberry Orange Stuffed Glazed Pork, and this amazing soup that The Boy LOVES. It’s our number 1 favorite soup.
Monday, November 9, 2009
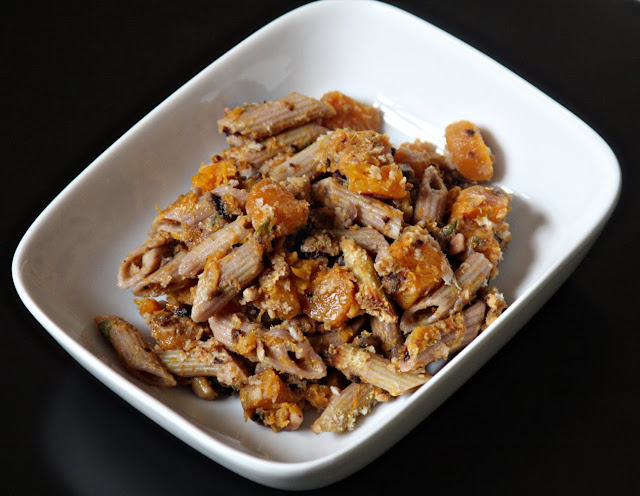
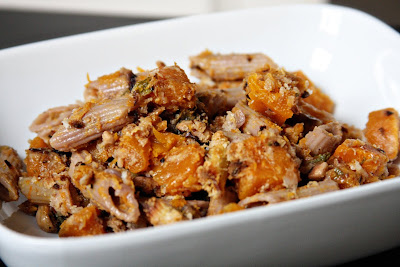
The sad thing about this meal is, it doesn’t look the least bit as delicious at it tasted. Don’t you hate that? I found this recipe on Whole Foods website or newsletter (one of the two, I can’t remember), and was intrigued. I’m always looking for new ways to cook butternut squash, as I’ve received one in just about every CSA share for quite a few weeks. I’m pretty sure I’ve never made anything with coconut milk, so I was unsure of how it would pair with the squash and sage.
One thing is for sure, it smelled amazing when I was preparing it! The end result was warm, rich, nutty, and comforting. A perfect dish on a cold day. The sage is a traditional compliment to the squash, and the toasted nuts add a nice crunch. I was surprised to learn this dish is also vegan! As Lesley pointed out in my Cous Cous Salad with Butternut Squash and Cranberries post, vegan cooking doesn’t have to be difficult or tasteless. While I don’t plan on converting to vegan, or even vegetarian, I believe the more dishes I can enjoy that happen to fulfill those guidelines is fine with me! Also, this meal is dairy-free so if you need a dish to serve to a friend who is lactose intolerant, try this! 😉
Print
Butternut Squash Pasta Casserole
Ingredients:
2 tablespoons olive oil
1 large yellow onion, thinly sliced
1 butternut squash (about 2 pounds), peeled, seeded and cut into 1-inch pieces
1 (15-ounce) can light coconut milk
Salt and pepper to taste
1 tablespoon chopped sage
¾ pound dried whole wheat penne
½ cup chopped toasted walnuts
½ cup bread crumbs (I used Panko)
Directions:
Preheat oven to 350°F. Lightly oil a 9- x 13-inch casserole dish; set aside.
Heat oil in a medium pot over medium heat. Add onions and cook, stirring often, until softened, 5 to 7 minutes. Add squash, coconut milk, salt and pepper and bring to a boil. Cover, reduce heat to medium low and simmer until squash is tender, about 20 minutes. Stir in sage and simmer 1 minute more. (This part can be made ahead, up to 1 day in advance.)
Meanwhile, bring a large pot of salted water to a boil. Add pasta and cook until tender but still firm, about 8 minutes. Rinse in cold water, drain well and transfer to a large bowl. Transfer squash mixture to bowl with penne. Add walnuts, salt and pepper and toss to combine. Transfer to prepared dish and top with bread crumbs. Bake until just golden brown and hot throughout, about 30 minutes.
Thursday, November 5, 2009
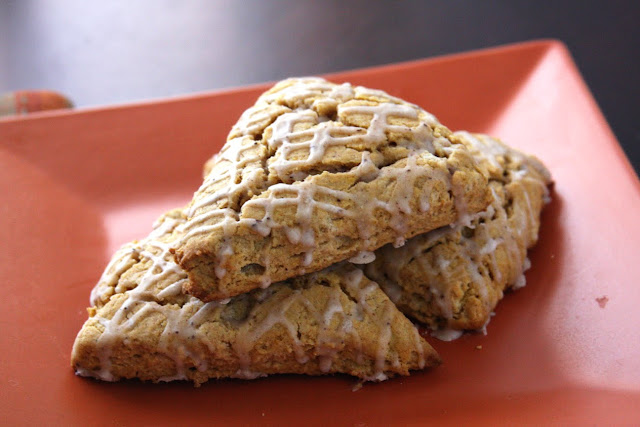
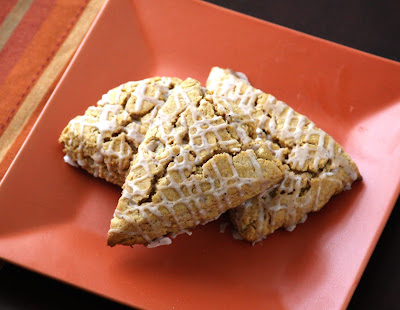
Want to hear a confession? Until recently, I had no idea what a scone was. Seriously. Maybe it’s my raising, I grew up in KY; we had muffins, and biscuits, cookies, pies, tarts… but I never had a scone.
I “discovered” them on people’s food blogs, and then realized they served them at Starbucks. I never EVER buy anything in the pastries case there, so I suppose that’s why I never noticed them. Once I realized what they were (basically like a sweet biscuit), it took a while before they appealed to me. They just looked dry and tasteless. And yet… I kept seeing them and seeing them. (Isn’t it funny how you never know something exists, but once you do, it’s EVERYWHERE?) My curiousity was finally piqued and one Sunday morning I finally set to it. Are you at all surprised I chose Pumpkin Scones as my first venture?
I’m happy to report, these babies are FAR from tasteless or dry! They are decadently delicious. They are moist and soft, with just enough pumpkin to appease my tastes. And let me suggest the perfect pairing, a pumpkin spice latte! I have enough self control to limit myself to just one. The Boy ate one, and asked for another. Then I went to the park for a couple hours and came home to discover ANOTHER one missing. HE ATE THREE! What ever shall I do with him?
Print
Pumpkin Scones
Ingredients:
1 C. all purpose flour
1 C. cake flour
1 1/2 t. baking powder
1/2 t. salt
1/2 t. ground cinnamon
1/2 t. ground nutmeg
1/4 t. ground allspice
1/4 t. ground ginger
6 T. unsalted butter
1/3 C. pumpkin puree
1/3 C. heavy cream
6 T. brown sugar
1 t. vanilla
Directions:
1. Preheat oven to 425 degrees. Get out a baking sheet and line with parchment paper (not required but makes cleanup easy!). Cut the butter into small pieces, put it in a small bowl and put it back in the refridgerator. In a medium bowl, combine both flours, baking powder, salt, and all spices. Whisk together well. Place bowl in freezer (refrigerator is fine if you have no room in freezer).
2. In a separate bowl, combine pumpkin, heavy cream, brown sugar, and vanilla. Whisk together well. Put this bowl in freezer (or refrigerator) and take the other bowl back out. Get the butter pieces out of the fridge and dump them into the bowl with the flour mixture. Cut the butter into the flour using a pastry blender or rub it in with your fingertips until it resembles coarse crumbs.
3. Get the liquid mixture out of the freezer and pour into the flour mixture all at once. Stir with a wooden spoon until everything is just moistened. The dough will be very crumbly, this is the way it should be. Turn the mixture out onto the counter and push the pile together with your hands. It should stick together fairly well. Knead it just a couple of times until everything is together. Don’t knead it too much or the dough will get too sticky.
4. Pat the dough out into a rough circle, 3/4 to 1 inch thick. Cut it like a pie into 8 pieces. Place pieces on the baking sheet so that they are not touching. Bake scones for about 15 minutes at 425 degrees. They should be light brown on the bottom, the tops will darken as they cool.
For cinnamon icing, mix together 1 C. powdered sugar, 2 T. milk, 1/4 – 1/2 t. cinnamon (to taste). Adjust the amount of sugar or milk to make the icing the consistency you want. It should be pretty thick. Icing can be brushed on or drizzled.


