Sunday, December 13, 2009
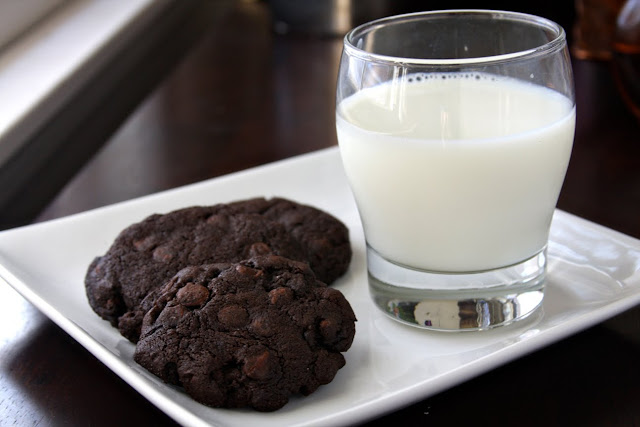
These may not scream Christmas when you look at them, but if you take a bite, it’s a little Christmas party in your mouth! (I know, that was so cheesy wasn’t it?) There’s a cookie on my blog I made a long long time ago (ok, so a lil over a year ago), Chocolate Cookies with White Chocolate Chips. Back when I had 1 follower. Back when my food photography skills were, umm… lacking. These cookies are so delicious I’ve actually made them quite a few more times. When I saw Hershey’s Mint Chocolate Chips on sale at the grocery, I couldn’t resist picking up a bag, and using them in a cookie I already knew & loved.
When I first made the cookies last year I used an itty bitty cookie scoop. This time I used my medium scoop. Also, I learned after my first batch that these cookies don’t flatten while baking. I’ve tried rolling them into a log and slicing them, but ran into issues with the chips getting cut. So the best thing to do is portion the dough into balls using a tablespoon or medium cookie scoop, and then use the bottom of a drinking glass to slightly press them down.
These were well liked at the Christmas party, and I think they brought me some mojo, because I walked away from the Dirty Santa with… a Bump-It. Oh yes. I can now have hair worthy of the Jersey Shore*. Be jealous. Oh, and go make these cookies.
*PS. I am making fun of the hairstyle on the girl, who is on the SHOW Jersey Shore. Nothing more. Please Domino’s, don’t pull your sponsorship from my blog. Oh, wait, you don’t sponsor my blog.


Print
Chocolate Mint Chocolate Chips Cookies
adapted from this cookie, originally adapted from AllRecipes
Ingredients:
1 cup butter, softened
2/3 cups white sugar
2/3 cup brown sugar
2 eggs
2 teaspoons vanilla extract
2 1/4 cups all-purpose flour
3/4 cup unsweetened cocoa powder
1 teaspoon baking soda
1 teaspoon salt
1 12 oz bag of mint chocolate chips
Directions:
Preheat oven to 375 degrees F. In a large bowl, cream together the butter and sugar until smooth. Beat in the eggs one at a time, then stir in the vanilla. Combine the flour, cocoa, baking soda and salt; stir into the creamed mixture. Fold in the mint chocolate chips. Using medium cookie scoop, drop onto ungreased cookie sheets.
Bake for 10 minutes in the preheated oven, until cookies are set. Allow cookies to cool on baking sheet for 5 minutes before removing to a wire rack to cool completely.
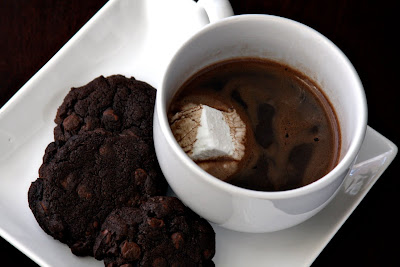
Can I recommend these cookies with some dark hot cocoa and homemade marshmallow? Not long after this photo, I ate a cookie and drank the hot cocoa for breakfast. hehehehe
**And this time last year I was enjoying these Buttered Rum Meltaways, and Peppermint Mocha Cupcakes!**
Thursday, December 10, 2009
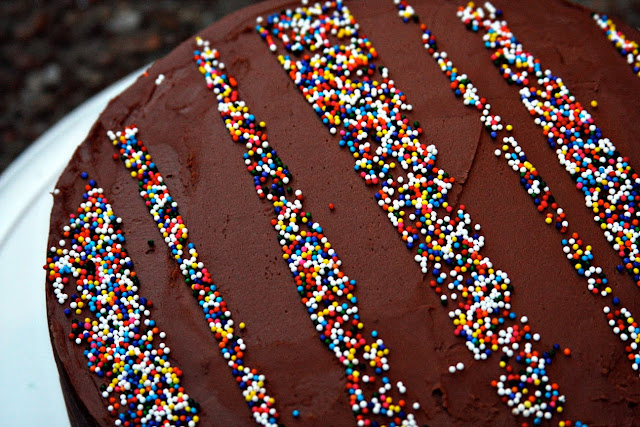
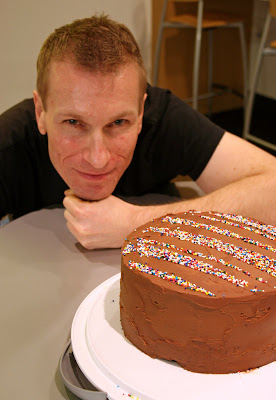
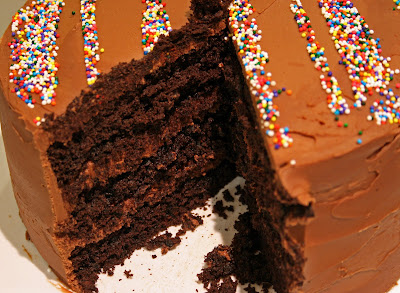
My good friend/producer’s birthday rolled around, and I love getting the chance to make him a cake every year. This was my third cake for him. He loves a rich decadent dessert. While browsing a selection of cakes on Epicurious, I knew the instant I saw this triple layer cake, it would be perfect for Tony.
The cake was moist, but not too wet; and very bouncy/spongey. It was rather delicate, and I wished I had followed the instructions of inverting it on cardboard rounds, as my first layer broke just a little. But I was more careful with the other two layers. Luckily I had planned to make the cakes 1 day before I made the frosting, so I wrapped them in wax paper, then plastic wrap, and put them in the freezer. About 12-16 hours later I moved them to the refrigerator. When I got ready to begin the frosting, I took them out of the fridge. This made them much more manageable to move and stack.

The frosting was incredible. The method of preparing it involved first making caramel, which I’ve done before, and combining it with melted, cooled chocolate. RICH RICH RICH! The instructions specifically said “do not overbeat or frosting will become stiff and grainy”. And my frosting was doing fine, it was smooth and beautiful. I shut off the mixer to just scrape down the sides of the bowl to help combine some of the caramel and chocolate (hmm… sounds like I need a scraper blade! Like this one or this one, please Santa!). Then within seconds of turning the mixer back on, it was grainy! I (freaked out and then) followed their tip of setting the bowl of frosting over saucepan of simmering water for 10-second intervals, and whisked just until the frosting was smooth and spreadable. Whew!
This cake, was truly exceptional! I’ve always wondered how to get that rich, delicious chocolate frosting like you get at a bakery. In my opinion, this hit the nail on the head! The Caramel Milk Chocolate Frosting was so sweet, but not overly sweet in the way a frosting made from powdered sugar and butter is; it was rich, and truly decadent. When combine with the dark, delicious flavor of the cake, it made for one awesome combination! This cake further emphasizes why I LOVE LOVE LOVE baking cakes from scratch. Every recipe produces a truly unique result. It’s worth all the time and effort, and the birthday boy sure appreciated it!
Print
Chocolate Cake with Caramel Milk Chocolate Frosting
from Bon Appetit, April 2003
Ingredients:
Cake Ingredients:
Nonstick vegetable oil spray
2 cups sifted cake flour (sifted, then measured)
1 cup unsweetened cocoa powder (preferably Dutch-process)
1 1/4 teaspoons baking soda
3/4 teaspoon salt
1/2 teaspoon baking powder
1 1/2 cups (packed) golden brown sugar
1 cup plus 2 tablespoons (2 1/2 sticks) unsalted butter, room temperature
3 large eggs
1 tablespoon vanilla extract
1 cup plus 2 tablespoons buttermilk
1/2 cup lukewarm water
1 cup semisweet chocolate chips
Frosting Ingredients:
24 ounces imported milk chocolate (such as Lindt), finely chopped
3 ounces bittersweet (not unsweetened) or semisweet chocolate, finely chopped
1 1/2 cups sugar
1/2 cup water
2 1/4 cups whipping cream
Directions:
Cake Preparation:
Preheat oven to 350°F. Spray three 9-inch-diameter cake pans with 1 1/2-inch-high sides with nonstick spray. Line bottom of pans with parchment paper. Whisk flour and next 4 ingredients in medium bowl. Using electric mixer, beat brown sugar and butter in large bowl until fluffy, about 2 minutes. Add eggs 1 at a time, beating well after each addition. Beat in vanilla. Beat in dry ingredients in 3 additions alternately with buttermilk in 2 additions. Beat in 1/2 cup lukewarm water. Stir in chocolate chips.
Divide batter among prepared pans (about 2 1/3 cups for each). Smooth tops. Bake cakes until tester inserted into center of cakes comes out clean, about 22 minutes. Cool completely in pans on racks. Invert cakes onto 9-inch-diameter cardboard rounds or tart pan bottoms (cakes are delicate). Peel off parchment.
Frosting Preparation:
Combine milk chocolate and bittersweet chocolate in large bowl. Stir sugar and 1/2 cup water in medium saucepan over medium heat until sugar dissolves. Boil without stirring until syrup is deep amber color, occasionally brushing down sides of pan with wet pastry brush and swirling pan, about 10 minutes. Carefully and slowly add whipping cream (mixture will bubble vigorously). Stir over low heat until any hard caramel bits dissolve and mixture is smooth. Pour caramel over chocolate; let stand 1 minute to allow chocolate to soften, then whisk until chocolate is melted and smooth. Chill chocolate-caramel frosting until completely cool, about 2 hours. Let stand 1 hour at room temperature before continuing.
Using electric mixer, beat frosting just until color resembles milk chocolate and frosting is easily spreadable, about 1 minute (do not overbeat or frosting will become stiff and grainy). If necessary to correct graininess, set bowl with frosting over saucepan of simmering water for 10-second intervals, whisking just until frosting is smooth and spreadable.
Place 1 cake layer on platter, flat side up. Spread 1 cup frosting evenly over top. Top with second cake layer, flat side up, pressing slightly to adhere. Spread 1 cup frosting over top. Top with third cake layer, rounded side up, pressing slightly. Spread remaining frosting over top and sides of cake, swirling decoratively. (Can be made 2 days ahead. Cover with cake dome and store at room temperature.)
**Special Thanks to my friend Kristen for taking photos (except for the first one) of the cake! I wasn’t there for the cake cutting because of my wacky work schedule, so she brought her camera in to snap these shots.**
This time last year I was… making CUPCAKES for the same guy! As well as a homemade breakfast sandwich, and some holiday cookies, Buttered Rum Meltaways.
Sunday, December 6, 2009
I’ve seen a lot of bloggers on other blogs get contacted by PR companies for free products and stuff like that. I’ve been blogging for over a year, so that gave me a lot of time to decide what I would do if/when one ever contacted me about free product. Anyone who knows me, knows that I LOVE to rave on & on about a product or service I like. I want my readers to always know that I will never ever rave about a product I don’t truly love. Also, I will always be 100% honest, and tell you when I received something free.
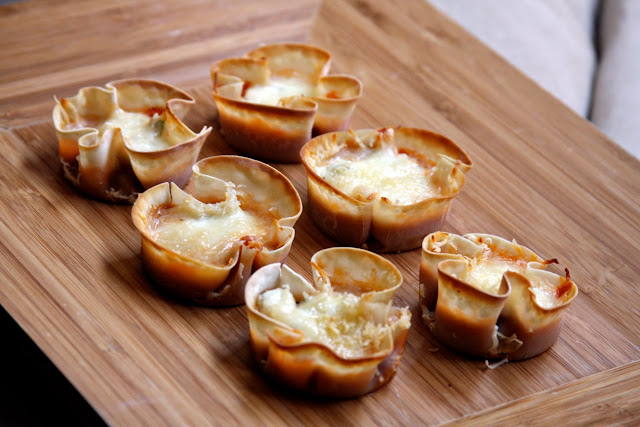
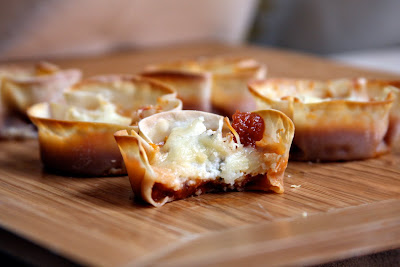
Now, that being said… can you tell I’ve been given a free product? A rep from Nasoya contacted me and asked if I would be interested in coupons for free products. I was already familiar with the company in the past because I had purchased tofu before. I could use the coupons for any of their products, and I went with the wonton wrappers. I was throwing a baby shower the Sunday after Thanksgiving, and I thought I could use the wonton wrappers to come up with some kind of tasty appetizer. I needed to keep it mainstream, and not do anything too wacky. When cooking, as when editing video (my job I love that pays the bills) I try to always be aware of my audience, and I knew something geared towards familiar comfort food would work best. Something I realized after purchasing the wonton wrappers was that people often use them to make ravioli. I decided to make a play on that, and do something italian, but also totally handheld, something you wouldn’t need a fork to eat. That’s how I arrived at the idea of doing mini lasagna bites.
This was so incredibly simple to whip up. If you know me, you know I run around like a crazy woman when throwing a shower or birthday party. I try to make everything perfect. So it was nice to have such an easy, stress free appetizer to quickly prepare. The exposed edges of the wonton wrapper crisped up a little, while the underneath, cup part held it’s formed shape, but remained a little bit softer & chewier. It really tasted like a little bite of lasagna. I was very happy with how this recipe turned out! If you know me, you know I have some trepidation when it comes to confidently creating and sharing my own recipes. I am confident enough in this recipe to enter it in Nasoya’s Holiday Wrap-Up Recipe Challenge. After doing the Slow Cooker Chili Cookoff, I’ve learned these types of contests can be fun, especially when you’ve got nothing to lose!
Print
Lasagna Appetizer Cups
Ingredients:
1 1/2 cups part skim ricotta
4-5 basil leaves, chopped
1 teaspoon italian seasoning
salt & cracked pepper to taste
1 1/2 cups marinara sauce
6 oz shredded mozzarella
24 Nasoya wonton wrappers, (the round ones)
freshly grated parmesan cheese
Directions:
Preheat oven to 375 degrees.
In a small bowl, mix together ricotta, chopped basil, italian seasoning, salt, & pepper.
Place wonton wrappers in standard muffin cups, to form little cups. Using a tablespoon, layer in marinara, then ricotta mixture, and sprinkle shredded cheese into each cup. Top with grated parmesan cheese.
Bake for 12-15 minutes or until cheese has melted. Let cool in muffin tin 2-3 minutes before removing. Serve immediately.
Friday, December 4, 2009
I am fortunate to live within a couple hours from the farm I grew up on. Yup, that’s right, FARM. A lot of my Nashville friends are SHOCKED to hear that I grew up on a farm. While it was wonderful growing up, I always knew I was destined for city living. As an adult, I love having a grocery store, restaurants, park, *cough* liquor store *cough*, coffee shop all within mere blocks. But as a kid, I loved being able to roam freely through the woods, climb/build forts/play hide-and-seek in the hay barn, and have tons of space to drive a four-wheeler or golf cart. There are plusses and minuses to both ways of life.

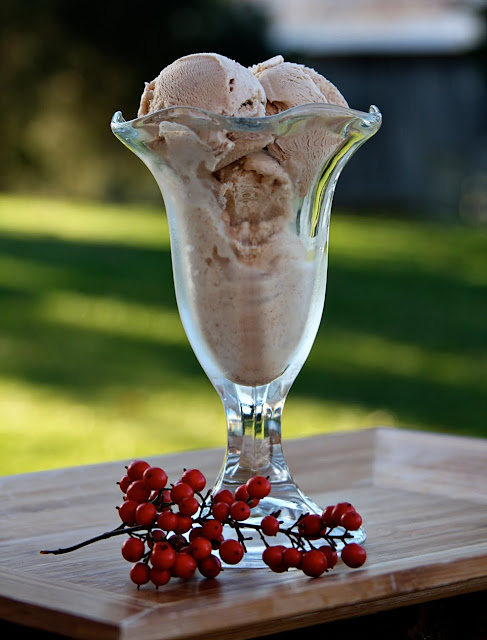
While visiting my hometown area for Thanksgiving break, I was also going to be throwing a baby shower (more on that in my next post!), so in order to make all the cupcakes and frosting, I hauled my KitchenAid Mixer home. I also knew my parent’s have a deep-freeze, so they’d have plenty of room for me to fit my ice cream maker bowl! While at the nearest Walmart (25 miles away!) shopping for the ingredients I’d need for the baby shower, as well as my Mammy’s Saturday night Thanksgiving get-together, I suddenly remembered I had plans to make ice cream, but never decided on what kind to make! I knew it needed to be simple, because I couldn’t afford to buy too many crazy ingredients. Luckily I pulled up the ice cream recipes I had bookmarked on my iPhone. I quickly zeroed in on the Cinnamon Ice Cream recipe I bookmarked back in July.
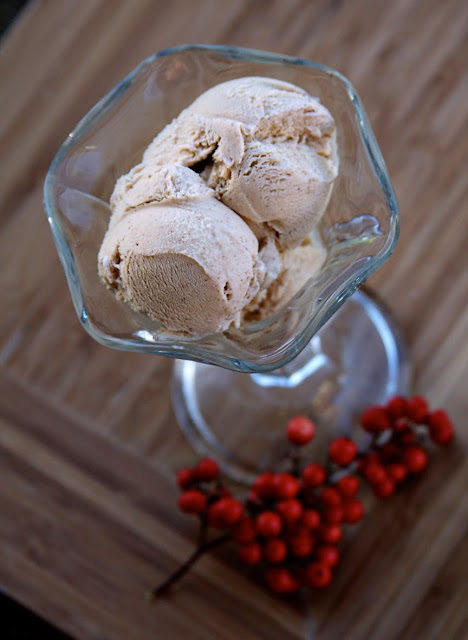
This was a great ice cream to make because, the ingredients are simple, and it doesn’t even require egg yolks. I honestly wasn’t sure if I would like this very much or not, because out of all the ice creams I’ve made in the past, I have found I prefer the richer flavor that comes from recipes that call for egg yolks. But from my very first bite, I was rewarded with a sweet, rich, creamy ice cream. Perfection! I really could not tell it didn’t include egg yolks. This ice cream called to mind a warm, down home on the farm, fall flavor. It truly was a pleasure to enjoy this ice cream while home in the country for the holiday. (And yes that’s a barn in the background of the first photo. There’s a barn in the backyard, and horses in the field out front.)
While making this ice cream at 3am I was joined in the kitchen by my chatty, opinionated little brother. He proceeded to state that homemade ice cream should only come in two flavors: vanilla & banana. Because anything other than that takes away from the pure simple flavor. (Funny how 19 year olds think they are the experts on everything.) Well… come time to enjoy the ice cream with dessert, I think his opinion was changed! He, along with my dad, and pretty much everyone else at my Mammy’s became huge fans of this simple, cinnamon spiced indulgence. It paired well with the cake and the pie served! Everyone loved it so much, I think if I were to show up at Christmas without homemade ice cream, I would be turned away at the door!
Print
Cinnamon Ice Cream
Ingredients:
2 cups whole milk
1/2 cup turbinado sugar (I used regular granulated sugar)
1/2 cup pure maple syrup
2 teaspoon ground cinnamon
2 cups heavy cream
1 teaspoon pure vanilla extract
1 teaspoon coarse salt
Directions:
Prepare an ice-water bath; set aside.
Combine the milk, sugar, maple syrup, and cinnamon in a medium saucepan over medium heat. Cook, stirring occasionally, until mixture just begins to bubble and sugar has dissolved, 6 to 8 minutes. Add cream, vanilla, and salt; stir to combine. Pour mixture into a medium bowl set in the ice-water bath. Stir occasionally until cooled. Cover and transfer to refrigerator until chilled at least 1 hour and up to overnight.
Stir mixture briefly; pour into an ice-cream maker and process according to manufacturer's instructions. Store ice cream in a covered container in the freezer, at least 1 hour and up to 1 week. Ice cream is best served within 3 days.
*As you can tell, this ice cream maintained a soft, easily scoopable texture. YUM! I wish I had a bowl of it right now!*
And this time last year I was enjoying Pumpkin Waffles, Pumpkin White Chocolate Blondies, and my favorite Black Bean Soup.


