Monday, January 11, 2010
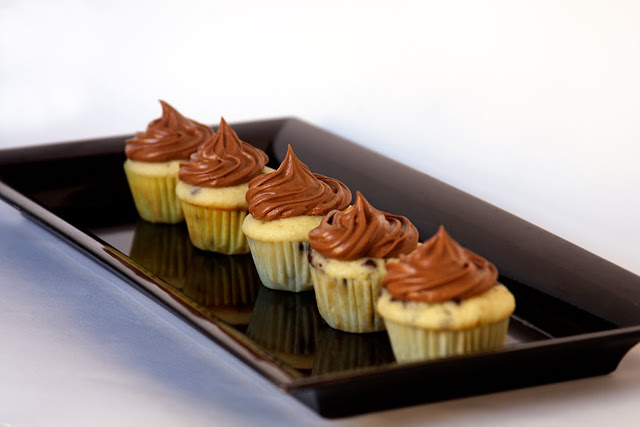
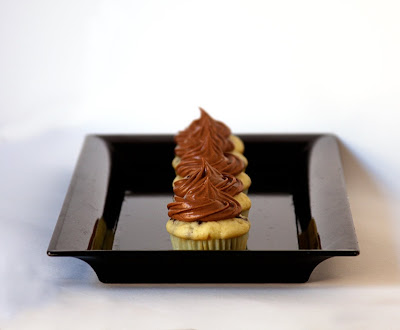
While going through some photos I realized I never posted these cupcakes! They are too delicious, not to share. I made these to take to the hospital to celebrate the arrival of my friends new babies. Yup, I said BABIES! Triplets! Remember the Peas in the Pod Cupcakes I made a while back for her baby shower? Well the babies arrived on Nov 19th, and were all home by Christmas Day! I was lucky enough to live within walking distance to the hospital, so I got to visit quite often while they were there and I got to see their tiny cuteness up close and personal. I thought the mini chocolate chips speckling the mini cupcakes were a perfect way to welcome such itty bitty babies into the world! Congrats Melissa & Jamie!
This chocolate frosting is so creamy and delicious, it paired perfectly with the moist & delicious cupcakes. Make these today, and you won’t be disappointed!

Print
Mini Chocolate Chip Cupcakes with Milk Chocolate Frosting
adapted from Perfect Cupcakes
Yields: 16 mini or approx 6 regular sized cupcakes
Ingredients:
1 cup all purpose flour
1/4 cup sugar
1 1/2 teaspoons baking powder
1/2 teaspoon salt
1/2 cup mini chocolate chips
1 egg
1/2 cup milk
3 Tablespoons butter, melted
1/2 teaspoon vanilla extract
Frosting:
2 cups confectioners sugar
1/4 cup unsweetened cocoa powder
1/4 cup butter
3 tablespoons evaporated milk
3/4 teaspoon vanilla extract
Directions:
Preheat oven to 350 degrees. Prepare muffin tins with liners.
In a medium bowl whisk together flour, baking powder, salt and sugar; then add chocolate chips. In a small mixing bowl, lightly beat the egg, then add milk, melted butter, and vanilla. Add to flour mixture and stir until just moistened. Divide among the prepared cups.
Bake until the tops spring back when lightly tapped, 12-15 minutes. Remove from the oven and cool in the pan for 10 minutes, then transfer to a wire rack to cool.
For Frosting: In a small bowl, sift together the confectioners' sugar and cocoa, and set aside. In a medium bowl, cream butter until smooth, then gradually beat in sugar mixture alternately with evaporated milk. Blend in vanilla. Beat until light and fluffy. If necessary, adjust consistency with more milk or sugar.
Monday, January 4, 2010

Happy New Year! I hope everyone had a great Christmas. I know I sure did! I got not one, but TWO tripods! hehe… (Don’t worry, one has been returned!)
I didn’t think I’d get the chance to blog this meal, but as it turned out The Boy forgot the leftovers were in the fridge. Even when I realized I could take a picture, I wasn’t sure if I wanted to. I mean… this was SO UGLY! But you know, it was also delicious AND healthy, so those two factors outweighed it’s appearance and won a spot on the blog. While I do love beautiful photos of food, I think it would be a travesty not to share this. So many people make the resolution to eat healthier in January, and a recipe high in protein, low in carbs & fat such as this one is a great choice.
This was a delicious take on your typical comfort food, meatloaf. It had the heat of buffalo wings, but not the fat. It tasted great on a cold winter day. I asked The Boy what he thought about it, and he said “It could have been hotter.” Of COURSE! The man has a heat tolerance level like no one I’ve ever met.

Print
Buffalo Chicken Meatloaf
Ingredients:
Olive oil spray
2/3 cup old fashioned oats
1/2 cup fat free milk
1/3 cup hot sauce, plus more to sprinkle on top
1 lb extra-lean ground chicken breast
1/4 cup finely chopped celery
1/4 cup shredded carrot (I didn't have any on hand, so I just increased the celery & onion)
1/4 cup finely chopped sweet onion
2 large egg whites, lightly beaten
1/4 teaspoon salt
1/2 cup crumbled reduced fat blue cheese
Directions:
Preheat oven to 350F. Lightly mist a 9” x 5” x 3” nonstick loaf pan with olive oil spray.
Combine oats and milk in a medium size mixing bowl. Mix well. Let stand for 3 minutes or until oats are softened. Stir in hot sauce until well mixed. Add chicken, celery, carrots, onion, egg whites, and salt. With fork, mix ingredients well. Add blue cheese and gently mix.
Transfer mixture to pan and spread so that top is flat. Sprinkle on a couple shakes of hot sauce and spread evenly. Bake 35 to 40 mins or until chicken is no longer pink. Cut into 8 slices. Makes 4 servings.
Nutrition Facts: 263 calories per serving, 35g protein, 14g carbohydrates, 6g fat (2g saturated fat), 74mg sodium (Note: 2 slices = 1 serving.)
Monday, December 21, 2009
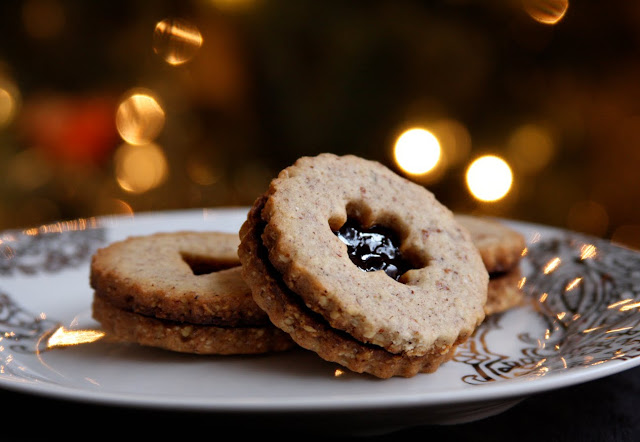
Aren’t these cookies pretty? Don’t they just look like cookies baked by someone who can do no wrong in the kitchen? Well my friends, let me tell you, everyone has their successes and failures. Unfortunately, I failed more than I succeeded here. I don’t think I rolled the cookies out evenly, and I baked them a little too long, and out of all the cookies that had the cutouts, only FOUR did not burn. Yes. That’s right, I said four. You don’t believe me? Just look at this.
So, what did I do? Did I cry? Nope, I just laughed. And I learned my lesson, keep an eye on the oven!
Personally, I love cookies of all kind. These buttery, delicious, slightly crisp cookies are were a fun & yummy cookie in my opinion. The Boy on the other hand, only wants a cookie if it’s soft and chewy, so he wasn’t a fan of these. Especially if he was given the option between these and the Espresso Snowcaps! But that’s fine with me, because after giving the 4 away to my good friends, I had just enough of the solid, non-cutout cookies that did NOT burn to enjoy for myself!
Print
Linzer Sables
from Baking from My Home to Yours
makes 50 cookies, or 25 sandwich cookies
Ingredients:
1 1/2 cups finely ground almonds, hazelnuts, or walnuts
1 1/2 cups all-purpose flour
1 1/2 teaspoons ground cinnamon
1/4 teaspoon salt
scant 1/4 teaspoon ground cloves
1 large egg
2 teaspoons water
1 stick (8 tablespoons) unsalted butter, at room temperature
1/2 cup sugar
1/2 cup raspberry jam or strained apricot jam plus 1 teaspoon water
Directions:
Whisk together the ground nuts, flour, cinnamon, salt, and cloves. Using a fork, stir the egg and water together in a small bowl.
Working with a stand mixer fitted with the paddle attachment, or with a hand mixer in a large bowl, beat the butter and sugar together at medium speed until smooth, about 3 minutes, scraping down the bowl as needed. Add the egg mixture and beat for 1 minute more. Reduce the speed to low and add the dry ingredients, mixing only until they disappear into the dough. Don’t work the dough too much once the flour is incorporated. If the dough comes together but some dry crumbs remain in the bottom of the bowl, stop the mixer and finish blending the ingredients with a rubber spatula or your hands.
Divide the dough in half. Working with one half at a time, put the dough between two large sheets of wax paper or plastic wrap. Using your hands, flatten the dough into a disk, then grab a rolling pin and roll out the dough, turning it over frequently so that the paper doesn’t cut into it, until it is about 1/4-inch thick. Leave the dough in the paper and repeat with the second piece of dough. Transfer the wrapped dough to a baking sheet or cutting board (to keep it flat) and refrigerate or freeze it until it is very firm, about 2 hours in the refrigerator or 45 minutes in the freezer. The rolled-out dough can be wrapped airtight and stored in the refrigerator for up to 3 days or the freezer for up to 2 months. Just thaw the dough enough to cut and go from there.
Center a rack in the oven and preheat the oven to 375° F. Line two baking sheets with parchment or silicone mats.
Peel off the top sheet of waxed paper from one piece of dough and, using a 2-inch round cookie cutter—a scalloped cutter is nice for these—cut out as many cookies as you can. If you want to have a peekaboo cutout, use the end of a piping tip to cut out a very small circle from the centers of half the cookies. Transfer the rounds to the baking sheets, leaving a little space between the cookies. Set the scraps aside—you can combine them with the scraps of the second disk and roll out and cut more cookies.
Bake the cookies one sheet at a time for 11 to 13 minutes, or until the cookies are lightly golden, dry, and just firm to the touch. Transfer the cookies to a rack to cool to room temperature.
Repeat with the second disk of dough, making sure to cool the baking sheets between batches. Gather the scraps of dough together, press them into a disk, roll them between sheets of waxed paper and refrigerate until firm, then cut and bake.
Place the jam in a small saucepan or in a microwaveable bowl and stir in the 1 teaspoon water. Bring to a boil over low heat or in the microwave. Let the jam cool slightly, then turn half of the cookies flat side up and place about 1/2 teaspoon jam in the center of each cookie; sandwich with the remaining cookies.
Just before serving, dust with confectioner’s sugar.
Sunday, December 20, 2009
It’s amazing how much my life has changed since I began food blogging. (And I’m not talking about the extra poundage around my middle…) When I first began blogging, I wasn’t all that much into baking, I never knew you could make your own marshmallows, and I wasn’t very experimental in the kitchen (and if I was, it was rarely a success). Once I realized it was possible to make your own marshmallows, I tried it, killed my cheap hand mixer, bought a stand mixer, and have just continued to expand my culinary horizons from there!
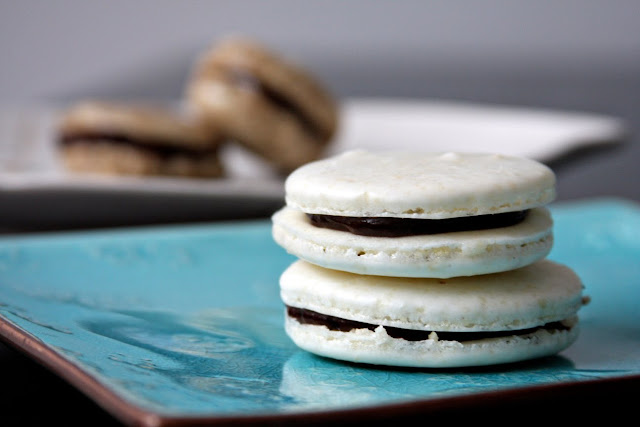
Another discovery I’ve made while food blogging, is french macarons. For a while there it seemed they were all over the place, just like marshmallows had been a couple months before. It seemed they were a little difficult to make. Plus the recipes were often in grams, and I don’t have a food scale (Santa can you hear me?). So, one day when I was at a local bakery, in queue to buy a loaf of sweet potato pecan bread, I noticed the macarons eyeing me. As luck would have it, once I made it up to the cashier I discovered they were out of the bread I wanted. So, to not make my wait in vain, I ordered a french macaron. I honestly don’t even remember which one it was. All I know is that is was my first, and it was AMAZING! Wow… it melted in my mouth, with some richness & sweetness. I tweeted about it.
My friend, and amazing food blogger/graphic designer/small business owner extraordinaire, Lindsay of Love and Olive Oil, saw my tweet and asked if I wanted to make macarons with her! So we had a little macaron Sunday session, and ummm… We tried! We didn’t know what we were doing too much, but we made a mess and we ate some yummy, albeit messy cookies.
As with many things I make/bake on here, everything is a learning process. Here’s what we learned:
Almond moisture may have something to do with our success. We were more successful with almond meal/flour than we were with blanched, shelled almonds ground in the food processor.
Slow & low tends to work better. Especially because these can appear to be done, even if they are not.
Ganache can basically make anything better.
Ugly can still be mighty tasty.
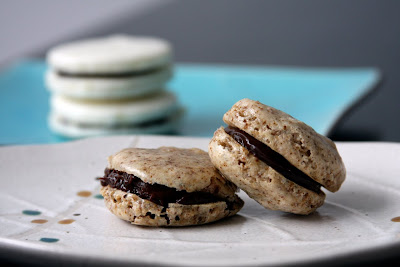
So stay tuned… We think there’s a round 2 in our future, and we’ll take what we learned, and hopefully have a little more success. Because, the cookies at the top of the post, yeah, those 4 were the only pretty ones! But we had fun, and most often that’s the most important thing, right?
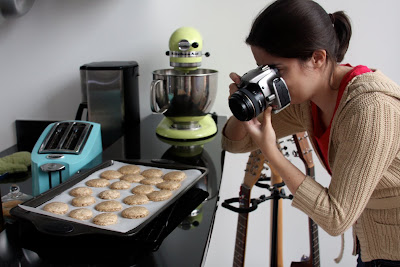
Be sure to head over to Lindsay’s blog to check out her post about our experience!


