Friday, April 21, 2017

We love to use tortellini in one pot recipes and soups in our house. I went looking for a recipe similar to something I’ve made in the past, but spring-inspired. I was trying to keep the ingredients list low, but flavor high. I’m so glad I found this recipe. I had to do some variations based on what I could find in our local grocery, as the original recipe called for broccolini and I could only find broccoli. And I also used turkey kielbasa instead of Italian-style chicken sausage. I’m glad the ingredients list was small, because I packed up everything and hit the road to visit my sister’s family 4 hours away, to welcome their new baby girl.
The night I made the soup my kids were too busy playing with their cousin to really eat much. But when we had leftovers the following night, they loved it! My son even asked if I could make it again another night. Granted, my children did some vegetable trading, as one kid likes peas but not broccoli and vice versa. I was super impressed with the flavor of this! I was a tad bit worried the pea flavor would be too strong, but it ends up being just perfect. This was a great combination of flavors, and I can’t wait to eat it again!

Print
Spring Tortellini Soup
Yield: 6 servings
Prep Time: 15 minutes
Total Time: 30 minutes
Ingredients:
14 ounces turkey kielbasa, sliced
1 tablespoon olive oil
8 cups reduced-sodium chicken broth (*I used Better Than Bouillion + water)
12 ounces broccoli, trimmed and chopped
1 9 - ounce package refrigerated cheese-filled tortellini
1 cup fresh or frozen peas
2 green onions, sliced
1 teaspoon dried thyme, crushed
Directions:
In a 4- to 6-quart saucepan, brown kielbasa in hot olive oil over medium heat. Add broth; bring to boiling. Add tortellini and thyme; cook 2 minutes. Add remaining ingredients and cook 3 to 5 minutes more or until tortellini is done and broccoli is just tender.
Servings Per Recipe 6, Cobalamin (Vit. B12) (µg) 0, sodium (mg) 1273, fiber (g) 4, cal. (kcal) 298, iron (mg) 3, vit. A (IU) 730, Fat, total (g) 10, vit. C (mg) 63, sugar (g) 5, Potassium (mg) 526, pro. (g) 23, calcium (mg) 126, carb. (g) 30, Niacin (mg) 3, Monounsaturated fat (g) 2, Pyridoxine (Vit. B6) (mg) 0, chol. (mg) 59, Thiamin (mg) 0, sat. fat (g) 3, Riboflavin (mg) 0, Folate (µg) 64, Polyunsaturated fat (g) 0, Trans fatty acid (g) 0
Thursday, February 23, 2017

You know that saying about not missing something until it’s gone? Well, my ice cream maker sat sad & unused in my deep freeze for a long time. One day I finally made a quick & simple recipe I never even blogged (but should have). After the freezer bowl thawed, I decided since I don’t make ice cream often I shouldn’t keep the bowl frozen all the time, as it takes up space. So I moved it to the pantry where it sat for another long amount of time. Fast forward to fall (maybe even summer??) when a coworker mentioned they got a new KitchenAid stand mixer, so I offered up my ice cream maker attachment on loan. OF COURSE all I could think about after that was making ice cream.
When I got it back, I didn’t wait too long to finally make a new batch! While I have a ton of recipes I already know & love (but haven’t added to since 2012!) I knew I wanted to try something different. I decided to go with a Jeni’s Ice Cream recipe for pistachio ice cream. In the past I’ve also enjoyed Talenti Gelato’s pistachio gelato, but I don’t like that they have pieces of pistachio in the ice cream. I just don’t like nuts in my ice cream. I knew I wanted to bump up the flavor so I decided to chop dark chocolate in my food processor until I had tiny shavings. I love bits of chocolate that don’t crunch, but melt when they hit your mouth.
I gotta say, I think this ice cream really hit it out of the park! The pistachio flavor, which comes from real pistachios really shines through. It was worth getting raw fingers from shelling all the pistachios. (Y’all know I’m too cheap to buy them already shelled.) And just as I had hoped, the chocolate warmed with each bite & melted for the perfect pairing. If you’re a pistachio fan, or are just looking for a sophisticated ice cream to try, look no further.

Print
Chocolate Flecked Pistachio Ice Cream
Ingredients:
6 ounces dark chocolate finely chopped or shaved
2 cups whole milk
1 tablespoon plus 1 teaspoon cornstarch
1 1/2 ounces cream cheese, softened (3 tablespoons)
1 1/4 cups heavy cream
2/3 cup sugar
1 1/2 tablespoons light corn syrup
1/2 cup toasted pistachios, very finely ground
1/4 teaspoon pure almond extract
1/4 teaspoon kosher salt
Directions:
Fill a large bowl with ice water. In a small bowl, mix 2 tablespoons of the milk with the cornstarch. In another large bowl, whisk the cream cheese until smooth.
In a large saucepan, combine the remaining milk with the heavy cream, sugar and corn syrup. Bring the milk mixture to a boil and cook over moderate heat until the sugar dissolves, about 4 minutes. Off the heat, gradually whisk in the cornstarch mixture. Return to a boil and cook over moderately high heat until the mixture is slightly thickened, about 1 minute.
Gradually whisk the hot milk mixture into the cream cheese until smooth. Whisk in the pistachios, almond extract and salt. Set the bowl in the ice water bath and let stand, stirring occasionally, until cold, about 20 minutes. Then transfer to the refrigerator to cool 2 hours or more.
Strain the ice cream base, pressing the pistachios with the back of a spoon to extract all the flavor. Pour base into ice cream maker and churn to the manufacturer's instructions. Transfer ice cream to a freezer safe container, blending in shaved chocolate with a spatula or spoon. Press a sheet of plastic wrap directly onto the surface of the ice cream and close with an airtight lid. Freeze the pistachio ice cream until firm, about 4 hours.
*If you didn’t catch the link at the top, I have this KitchenAid Stand Mixer Ice Cream Attachment. I love it! A must have if you already have the stand mixer, and love ice cream.*
Friday, September 30, 2016

Music City Food + Wine 2016… In one phrase: Worth it. This is my fourth year attending the festival, and for the first time my husband wasn’t on kid-duty and could finally join me. For the longest time I have wanted him to experience the festival as I do, and enjoy it just the same. Well, the stars finally aligned and we secured childcare for our 2 rugrats. The stars may have aligned as far as childcare, but the clouds didn’t so much align for the weather forecast. We experienced our first rainy MCFW (there was a threat the first year of the festival, but it didn’t actually rain). And you know what, we had a freaking blast. He told me he finally understands, he finally gets it, and yes, it’s totally worth it.
Each year the festival gets bigger and better. Rain or shine, when you come to Music City Food + Wine you need to come prepared to eat & drink! Every year without fail I tell myself I will sample EVERYTHING. And every year while I’m there I eat & eat & eat & eat (& drink & drink & drink & drink) and then get so full I can’t consume anymore. When I later see pictures of things I missed, instant regret! Ha
As I’ve said before, this festival gets you up close & personal with amazing minds in the food world, and lets you connect with brands you know & love, as well as introducing you to new things to try & love. At the Williams Sonoma Pastry Tent I not only got to sample awesome bakery treats, I connected with people from USA Pan. I spoke with alcohol brand reps who were able to tell me exactly where to find their products in stores and restaurants. I got to hug & chat with a few of my favorite chefs, Levon Wallace & Brandon Frohne. And meet other local chefs such as Maneet Chauhan, Vasisht Ramusubramanian, & Kaelin Ulrich Trilling for the first time. Nashville has so much great local talent, Music City Food + Wine is THE BEST place to see & experience it all. There are lots of food and/or wine festivals & showcases in Nashville, but absolutely none compare to the experience Music City Food + Wine brings to the table. (Pun intended… my apologies.)
There are SO.MANY.AMAZING things to eat, drink, & experience. Here are just a few highlights.

Top L-R: Hattie B’s; Angostura Bitters; Otaku Ramen. Middle L-R: Arnold Myint; Arnold’s dish; Hendrick’s Gin Cucumber Mule. Bottom L-R: Virago; Virago; Proper Bagel

Top L-R: The Farmhouse; Juve y Camps; Martin’s BBQ & Friends. Middle: Patterson House & Wild Turkey’s “Wild Tiki” tent. Bottom: Blackberry Farm & Olive Sinclair.

Left: Me, the Target boots in a sea of Hunters. Top L-R: “Tiki Old Fashioned” from Patterson House & Wild Turkey; Peg Leg Porker & Springer Mountain Farm Chicken. Bottom Right: Catbird Seat
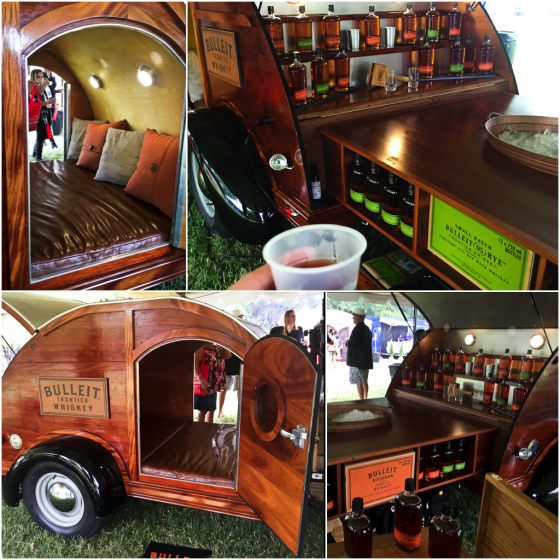
Confession: I’m a HUGE fan of Bulleit Boubon. And I’ve had an obsession with the Bulleit Bourbon Woody trailer ever since reading about it in Garden & Gun. Needless to say I was pretty hyped to see it in all it’s glory at the festival this year. If I win the lottery, I’m investing in one of these.
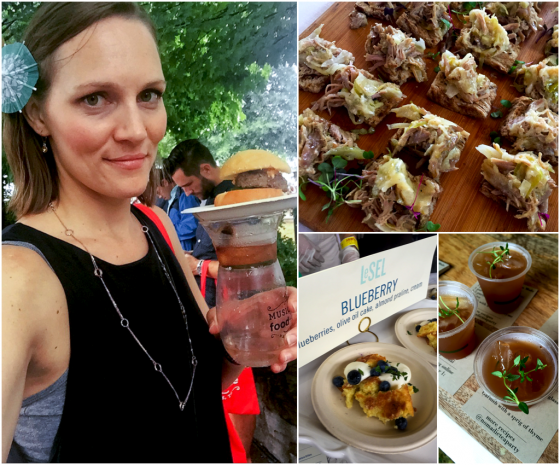
Left: Me & my mad festival stacking skills. Top R: Americano. Bottom L-R: Le Sel; Fireboat Chai.

Martin’s BBQ & Friends

Left: Tito’s Bloody Mary Bar. Middle T-B: festival; Virgil Kane; Gospel Brunch. Right: Tito’s.

Top L-R: The Hook; Utterly Nash at Williams Sonoma Tent; Watermark. Middle L-R: City Winery; “Frozen Bluegrass Bird” at Wild Turkey Tiki Tent with Patterson House; Biscuit Love. Bottom L-R: Bajo Sexto; Bastion; The Treehouse.
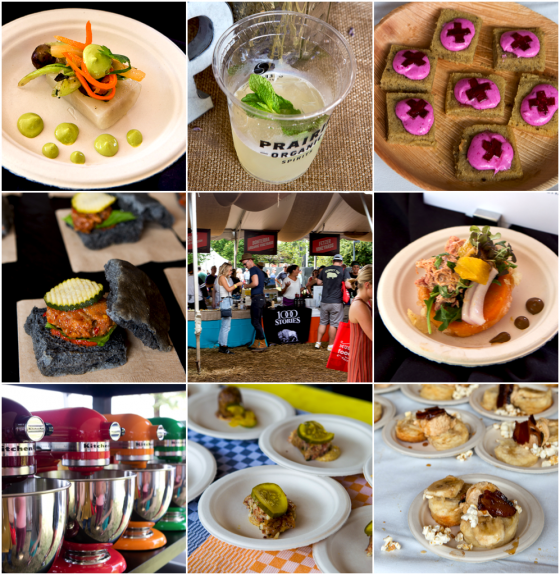
Top L-R: Etch restaurant; Praire Organic Spirits; Fido. Middle: Mangia Nashville; festival; etc restaurant. Bottom L-R: Kitchenaid; Cochon Butcher; Holler & Dash.

Top L-R: Me & the lovely BethEats of Eat.Drink.Smile; 5th & Taylor. Bottom L-R: Chauhan Masala & Ale House; Sahale Snacks tent.
As I said in my “why you should go” post, this festival is not to be missed! Thank you Music City Food + Wine for another great year. I’m already looking forward to 2017!
Thursday, September 22, 2016
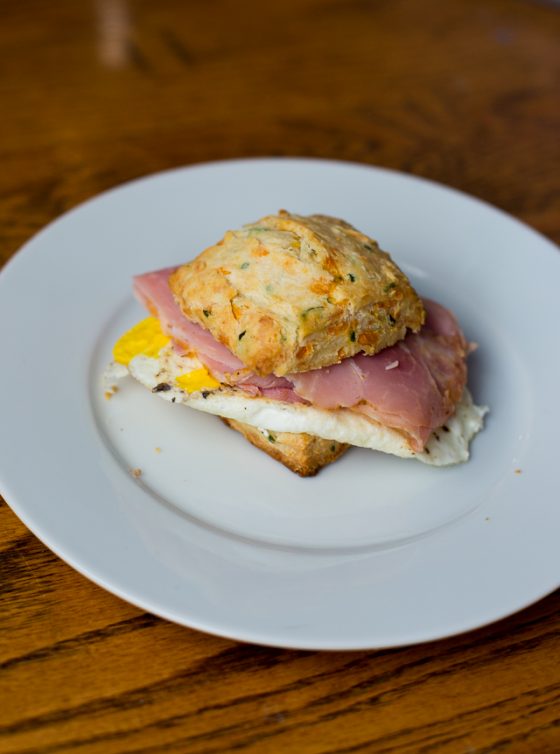 This past weekend was my favorite weekend in all of Nashville, Music City Food + Wine festival. I’ve told you the reasons why I love it so much already, and I am going through my pics and processing my thoughts over this year’s festival (best one yet! despite the rain!). But in the meantime I’ve got this recipe to share with you. It just so happened as the final day was wrapping up some friends & I were seated near the Williams Sonoma pop-up. Some very kind folks from USA Pan approached us and said “Hey, do you guys like to bake?” UMMMM YES! “Would you be interested in some bakeware?”
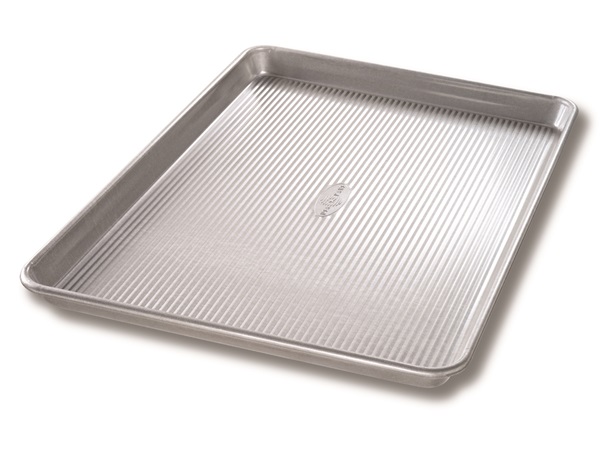
And so that’s how I happened to score this awesome new half sheet pan. They told us we don’t even need to use parchment, or grease the pan in any way, food will just slide off. And wow were they right! I baked these scones and they literally slid right off when they came out of the oven! Huge thanks to USA Pan, and also thank you universe for putting me in their line of sight at the end of the day, ha! I can’t wait to bake up some cookies on this pan!

These scones were a solution to my boredom with our regular biscuit routine. What I love so much about biscuits and scones is that I can do all the work in advance and freeze them. When morning comes, we can just pop them in the oven. I am not a morning person, to say the least. I made a double batch of these on a Friday afternoon to take a weekend our friends invited us out to their lake house. I thought these scones would be a savory start to build a stellar breakfast sandwich. Lake weekend we did scone + bacon + egg. Today I did scone + Boars Head Bold Peppernero Garlic Ham + egg. Scrumptious either way! Use good quality cheese and cream in these scones and you won’t be disappointed!
*Side note: My “real life” job is a video editor. For fun I took a GoPro Hero Session out on our lake visit with friends. If you want to see the video I edited, check it out!

Print
Cheddar Chive Scones
Yield: 16 scones
Prep Time: 25 min
Cook Time: 25 min
Total Time: 45 min
Ingredients:
3 cups all-purpose flour
1 tablespoon baking powder
1 tablespoon sugar
2 teaspoons salt
1/2 cup finely chopped fresh chives
5 oz extra-sharp Cheddar, coarsely grated (1 1/2 cups)
2 cups heavy cream plus additional for brushing
Directions:
Preheat oven to 400°F.
Whisk together flour, baking powder, sugar, and salt. Add chives and Cheddar, tossing to combine. Stir in cream with a fork until a sticky dough forms.
Turn dough out onto a lightly floured surface and knead 8 times with floured hands.
Halve dough and form each half into a 7-inch round. Brush tops of rounds with additional cream and cut each into 8 wedges.
Arrange wedges about 1/2 inch apart on an ungreased large baking sheet and bake in middle of oven until golden brown, about 20 minutes. Cool on a rack.
Disclosure: I scored the USA Pan baking sheet for free out of sheer luck. After just one use I already want more! The Boars Head company have no idea I exist, nor do they know I bought & endorsed their ham in this sandwich. I have an affiliate link to the GoPro camera I purchased & LOVE. If you’re looking for an action camera, but don’t want to shell out a ton of money, this one is only $200! Plus, I have experience with both this camera, and the Hero Silver 3+, and I honestly think the Session is much more consumer friendly and easier to use. I could talk your head off about it, so if you want more info, just leave me a comment and I’ll try to shoot you an email! Oh, GoPro doesn’t know I exist either.


 This past weekend was my favorite weekend in all of Nashville,

