Thursday, March 19, 2009
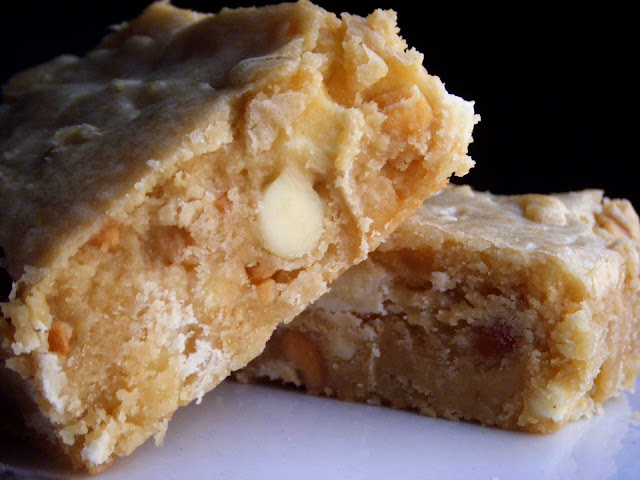
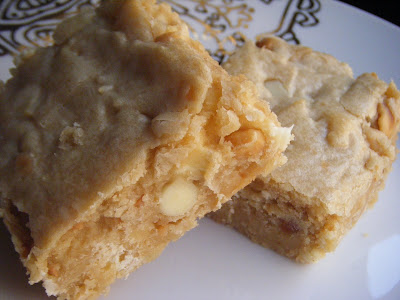
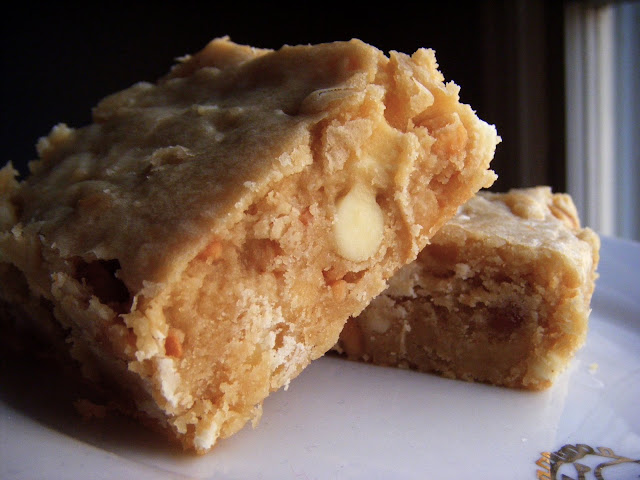
I knew the instant I saw these White Chocolate Macadamia Nut Blondies that they were right up The Boy’s alley. He often goes for a white chocolate macadamia nut cookie, and he also loves blondies. So, to combine then into one dessert, would truly be a special treat for him! Which is why I decided to save them until his birthday. You might be wondering, why I made these for his birthday, if I also made the Chocolate Cake with Salted Caramel Frosting. Well you see, poor pitiful Boy had his birthday fall on a Tuesday this year, and he had to work. We had made plans to go out of town to Atlanta to celebrate, but not until the following weekend. So he had 4 days in between the actual birthday and the cake. I knew I wanted to give him something sweet to tide him over!
And sweet these were! They are a VERY VERY rich dessert! The smell was so intoxicating as these baked. It’s best to wait until these cool completely before cutting them, but we couldn’t wait, and sort of cut into them right away a little. I honestly think he had three that night. I could be wrong though, maybe he had just two. If you’re looking for a bar dessert that is easily transportable and highly addictive, I suggest you give this recipe a try!

Print
White Chocolate Macadamia Nut Blondies
Ingredients:
1/2 pound, plus 1 teaspoon butter, at room temperature
1 1/2 cups light brown sugar
2 eggs
1 tablespoons vanilla extract
3 cups plus 1 tablespoon all-purpose flour
1 teaspoon baking powder
2 cups white chocolate chips
1 cup macadamia nuts, toasted and rough chopped
Directions:
Preheat the oven to 350 degrees F.
Place 1/2 pound of the butter and the brown sugar in the bowl of an electric mixer fitted with the paddle attachment. Cream the butter and sugar on medium speed until a smooth batter is formed. While the machine is running, add the eggs and vanilla extract, until incorporated into the batter.
Sift together 3 cups flour and baking powder. Slowly add the flour mixture to the batter and mix on low speed until a dough is formed. Very gently, by turning the mixer on and then off, fold the chips and nuts into the dough.
Once the dough is all blended, grease a 9 x 9-inch baking pan (I used a 9x13 pan, and still felt they were sufficiently thick) with the remaining butter and dust with the 1 tablespoon of flour. Pour the batter into the pan and place in the preheated oven. Bake for 25 to 30 minutes, or until set yet still moist.
Monday, March 16, 2009

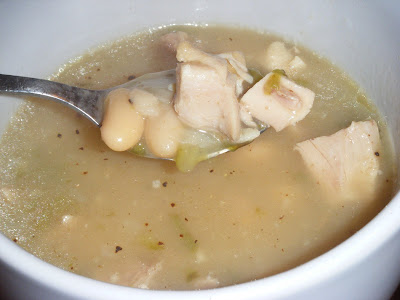
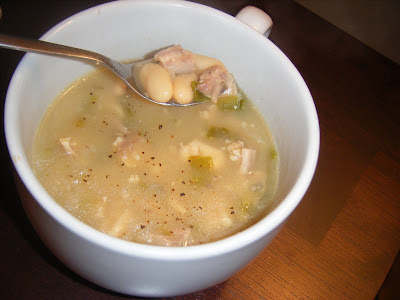
This isn’t the most appetizing looking dish. But it was healthy, yummy, and a great way to use up chicken leg quarters I had in my freezer! For better pics, check out Cooking Light’s page.
Print
Chicken Green Chili with White Beans
Ingredients:
6 Anaheim chiles
1 tablespoon peanut oil
3 chicken leg quarters, skinned (about 1 3/4 pounds)
1 3/4 cups chopped onion
4 garlic cloves, minced
4 cups fat-free, less-sodium chicken broth
2 cups water, divided
1 1/2 teaspoons ground cumin
1 (15.5-ounce) can cannellini beans or other white beans, rinsed and drained
3 tablespoons all-purpose flour
1 teaspoon salt
3 tablespoons reduced-fat sour cream
6 lime slices
Directions:
Preheat broiler.
Cut chiles in half; discard seeds and membranes. Place halves, skin sides up, on a foil-lined baking sheet; flatten with hand. Broil 5 minutes or until blackened. Place in a heavy-duty zip-top plastic bag; seal. Let stand 15 minutes. Peel chiles; discard skins. Chop chiles.
Heat oil in a large Dutch oven over medium-high heat. Add chicken; cook 4 minutes on each side or until browned. Remove chicken from pan. Add onion and garlic, and sauté 6 minutes or until browned, stirring frequently. Return chicken to pan. Add broth, 1 1/2 cups water, and cumin; bring to a simmer. Cook 20 minutes or until chicken is done. Remove chicken; cool slightly. Remove chicken from bones; cut meat into bite-sized pieces. Discard bones. Add chicken to pan; stir in chopped chiles and beans.
Combine 1/2 cup water and flour, stirring with a whisk. Stir into chicken mixture. Bring to a simmer; cook 15 minutes. Stir in salt. Spoon about 1 1/2 cups soup into each of 6 bowls; top each serving with 1 1/2 teaspoons sour cream. Serve with lime slices.
Nutritional Information: Calories:248; Fat:5.6g; Protein:19.1g; Carbohydrate:25.1g
Fiber:4.8g; Sodium:903mg
Saturday, March 14, 2009
As I previously mentioned, I went on a bit of a cookie baking binge a few weekends ago. Along with the chocolate sugar cookie, and the butterscotch oatmeal cookie, I wanted to make a classic chocolate chip cookie. Now, I already have a recipe that people love. Whenever I make them people are like, “THESE ARE THE BEST COOKIES EVER!”. But I just kept hearing rave reviews online about this Alton Brown recipe called “The Chewy”. Just in case (you live on Mars and) have never watched his show on the Food Network, Good Eats, it’s an incredibly informative, but still entertaining show. He really breaks it all down to a science. He spent an entire episode on Chocolate Chip Cookies, making “The Thin”, “The Puffy”, and “The Chewy”. How great is that? I’ve actually seen that episode, and I finally decided to try out one of the recipes.
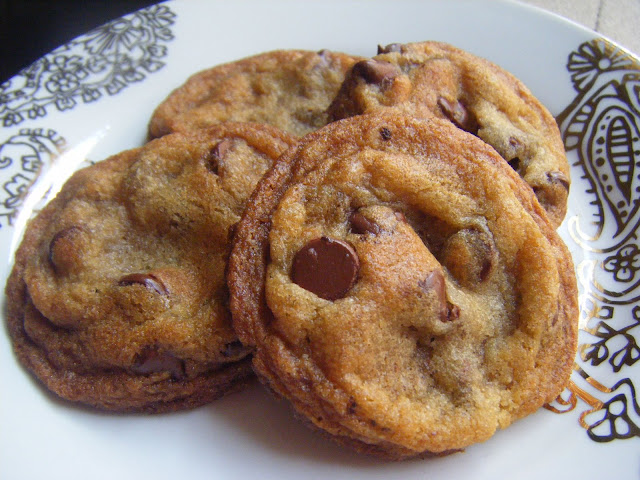
The first cookie I had from this recipe was when it was still slightly warm out of the oven. To which I immediately replied, “I like my other recipe better”. But really, I hadn’t given this recipe a shot, in the conditions is supposed to be good for. See, this recipe is supposed to produce a cookie that remains soft and “chewy” even for the next couple days. Sure enough when I had one of the cookies the next day it was melt-in-your-mouth chewy and buttery. This really was a yummy yummy recipe. I still think I’m gonna stick with my other recipe as my go-to ccc recipe. I do think I need better pictures of that cookie. I made it in my early early stages of blogging. That aside, that doesn’t mean I wouldn’t recommend this recipe. I definitely would! It just depends on your chocolate chip cookie preference. To me, in the other recipe, the cookies puff up a bit more, and I like that. You had more to sink your teeth into. These cookies were flatter, and greasier. Some people won’t mind that, but I did. If you want, check out this cookie comparison over at The Way The Cookie Crumbles, it’s one of the blogs that inspired me to finally try out this recipe!
Below is the recipe in it’s original form. The only thing I did different was use my small cookie scoop, so therefore my baking time was reduced. Definitely keep an eye on these cookies. Probably due to the melted butter, these cookies turn golden in color pretty fast.
Print
Alton Brown's "The Chewy"
Ingredients:
2 sticks unsalted butter
2 1/4 cups bread flour
1 teaspoon kosher salt
1 teaspoon baking soda
1/4 cup sugar
1 1/4 cups brown sugar
1 egg
1 egg yolk
2 tablespoons milk
1 1/2 teaspoons vanilla extract
2 cups semisweet chocolate chips
Directions:
Heat oven to 375 degrees F.
Melt the butter in a heavy-bottom medium saucepan over low heat. Sift together the flour, salt, and baking soda and set aside.
Pour the melted butter in the mixer's work bowl. Add the sugar and brown sugar. Cream the butter and sugars on medium speed. Add the egg, yolk, 2 tablespoons milk and vanilla extract and mix until well combined. Slowly incorporate the flour mixture until thoroughly combined. Stir in the chocolate chips.
Chill the dough, then scoop onto parchment-lined baking sheets, 6 cookies per sheet. Bake for 14 minutes or until golden brown, checking the cookies after 5 minutes. Rotate the baking sheet for even browning. Cool completely and store in an airtight container.

Special thanks to my cookie scoop for producing such perfect looking cookies!
Thursday, March 12, 2009
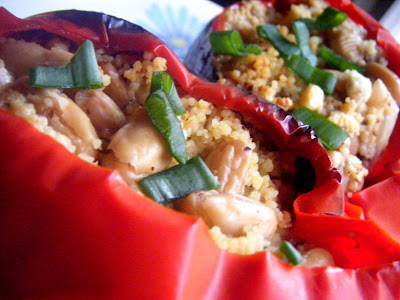
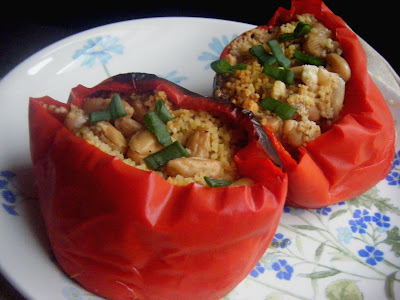
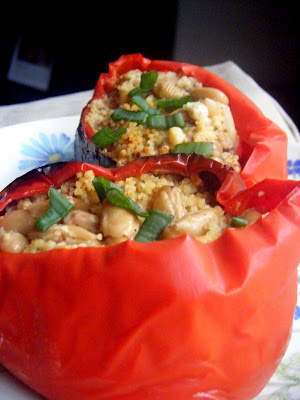
My good friend Liesl and I are cooking buddies. We really inspire each other, and often ask each other for advice, or share our cooking & baking adventures. She recently told me about these Greek Stuffed Peppers from Everyday Food she had made. I knew the flavors sounded like something I would like; and I should make it sometime. Then, when I saw red peppers were on sale at Kroger, I bought 4, and decided to use them for this recipe.
She made hers in the oven, but due to my wacky work schedule, it better suited The Boy and I to make them in the slow cooker. Luckily Miss Martha provided instructions for both methods. These were pretty easy to throw together, and I was surprised you didn’t have to cook the couscous first! I definitely recommend this recipe if you’re looking for a filling, vegetarian meal that you can easily prepare ahead of time. I ate mine alongside hummus & carrots, and a greek salad. Thanks again Liesl for sharing this recipe with me!
Print
Slow Cooker Greek Stuffed Peppers
Ingredients:
4 large bell peppers (I used red)
1 can (15 ounces) cannellini beans, rinsed and drained
1 cup crumbled feta (4 ounces)
1/2 cup couscous
4 scallions, white and green parts separated, thinly sliced
1 garlic clove, minced
1 teaspoon dried oregano
Coarse salt and ground pepper
Lemon wedges, for serving
Directions:
Slice a very thin layer from the base of each bell pepper so they sit flat. Slice off tops just below stem. Discard stems; chop tops, and place in a medium bowl. Remove ribs and seeds from peppers.
To bowl, add beans, feta, couscous, scallion whites, garlic, and oregano. Season with salt and pepper, and toss to combine. Stuff peppers with bean mixture; place upright in slow cooker. Cover; cook on high, 4 hours.
Sprinkle peppers with scallion greens; serve with lemon wedges.