Wednesday, March 11, 2009

When I was a kid, sometimes my dad would load my sister and I into his truck and we would ride along and check the cows. Once, we had stopped by the feed trough & the pond, and I can’t remember what my dad was doing, but my sister and I were throwing rocks into the pond to try and get a big splash. All the rocks that made a big splash were too heavy for me. Then I saw a BIG flat gray rock. I picked it up and was amazed that such a big rock would be so light! I said “Look at THIS big rock Daddy!” He started to snicker and said, “That’s not a rock Erin, that’s a cow patty.” Once I realized what it was I quickly dropped it.
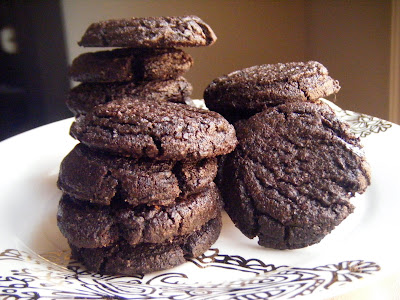
I know what you’re thinking, “Erin, why did you just tell a story about cow manure?” Is it just because I was raised on a farm that these cookies resemble cow patties to me? Maybe it’s just me… Anyways, the weekend I went on my big “I MUST BAKE COOKIES” binge, I decided I should definitely choose a recipe from my beloved Martha Stewart “Cookies” cookbook. I browsed through looking for a simple recipe that called for ingredients I already had on hand. I settled on her recipe for Giant Chocolate Sugar Cookies. I’m not a fan of giant oversized cookies; I actually prefer small cookies. That way I can only allow myself one, but still feel that I satisfied my sweet tooth! Her recipe says it makes eight cookies. I used my itty-bitty cookie scoop and I got FIFTY cookies. That’s quite a difference!
When baking smaller cookies, be sure to reduce the time. The longer these bake the crisper they become. The Boy and I preferred these when they were baked a short amount of time, so that they remained soft. In the recipe below, I’ve adjusted the times to what worked for me. After baking the first batch, I realized they weren’t going to flatten out much at all, so I used the bottom of a drinking glass to flatten them when I took them out of the oven.
Whether or not you think they look like cow patties, you really must consider trying this recipe. These cookies have a great chocolate flavor, and satisfy your craving for cookies & chocolate, in one bite. It truly tastes like a chocolate sugar cookies!

Print
Chocolate Sugar Cookies
Ingredients:
1 1/2 cups all-purpose flour
1/2 cup good-quality unsweetened Dutch-process cocoa powder
1 teaspoon baking powder
1/2 teaspoon salt
1/2 cup (1 stick) unsalted butter, softened
1 1/2 cups sugar
1/2 cup vegetable shortening, substitute 1/2 cup unsalted butter, melted and cooled
1 large egg
1 1/2 teaspoons pure vanilla extract
Directions:
Preheat oven to 375. Whisk together flour, cocoa powder, baking powder, and salt in a medium bowl; set aside.
Put butter and sugar into the bowl of an electric mixer fitted with the paddle attachment. Mix on medium-high speed until pale and fluffy. Mix in shortening (or additional butter). Add egg and vanilla; mix until creamy. Reduce speed to low. Gradually add flour mixture, and mix until just combined.
Using a scoop, drop dough onto baking sheets lined with parchment paper, spacing about 3 inches apart. Bake until edges are firm, 6-8 minutes. Let cool on sheets on wire racks. Cookies can be stored in an airtight container up to 2 days.
Sunday, March 8, 2009
Wow. Wow, wow, wow.
As The Boy’s birthday loomed I began to ponder what kind of cake to make him. I asked, and he said “Something chocolate.” Then he thought a little longer, and suggested the cake we had on my birthday, Hershey’s Perfectly Dark Chocolate Cake with White Chocolate Frosting. While I was flattered to know he really liked that cake, I was itching to try something new! I asked him if he was ok with me surprising him with a cake/frosting combo, as long as it included chocolate. Luckily, he was fine with that.
After a lot of browsing, I was finally inspired by the sweet & salty combination of a cake in the Baked cookbook. The Boy loves salty flavors. I didn’t use the Baked recipe, because I already felt really comfortable with the Hershey’s recipe for the cake (which I previously made with Pumpkin Cream Cheese frosting), and I found this recipe for Salted Caramel Frosting that seemed pretty easy. I’ve made homemade caramel in the past, and it’s such a decadent treat. It’s QUITE addictive, so I can’t let myself do it more than once or twice a year!
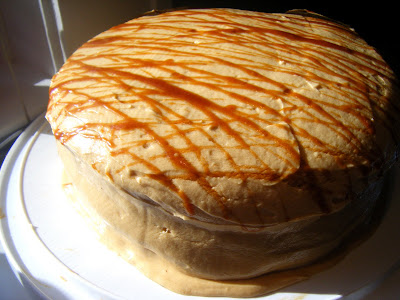
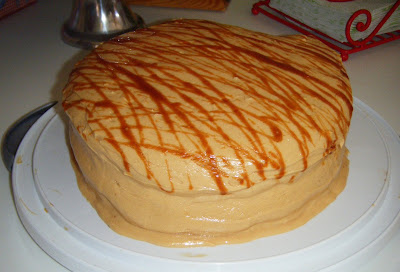
This (and I think I say this every time, but I really really mean it) is my favorite cake & frosting combo I’ve ever made. Wow. It truly was amazing. I can’t say enough about it, you really MUST try it.
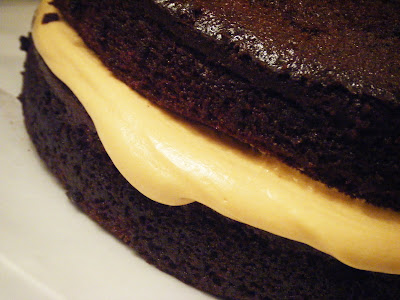
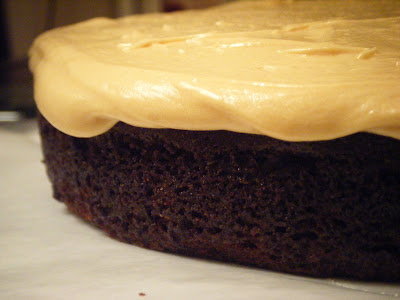
The frosting, which uses cream cheese & butter, as well as homemade salted caramel, is definitely not a stiff frosting. This cake is best kept in the fridge. Luckily because the cake is SO moist, it won’t dry out. If it’s kept in the fridge, the frosting will stay stiff and more stable, but if it’s kept too warm it will begin to droop a little. One thing I do suggest is… don’t try to put the cake in the car and drive all the way from Nashville to Atlanta. There’s a chance this could happen.

I guess the weight of the frosting, as it began to warm up in the car, pulled heavy on the soft moist cake, and perhaps one of the curves coming down the big ridge pulled some of it down! 🙁 Oh well. I’m just bummed I didn’t get a good picture of it before we left town. This was the best looking cake I ever frosted! It just didn’t survive the trip down.
If you’re looking for a cake & frosting combo that is unlike anything else, and you want a cake that will truly appeal to adult palates (without using alcohol, shocking for me, right?), then look no further than this cake.
Print
Hershey's Perfectly Chocolate Cake with Salted Caramel Frosting
Ingredients:
CAKE:
2 cups sugar
1-3/4 cups all-purpose flour
3/4 cup HERSHEY'S Cocoa
1-1/2 teaspoons baking powder
1-1/2 teaspoons baking soda
1 teaspoon salt
2 eggs
1 cup milk
1/2 cup vegetable oil
2 teaspoons vanilla extract
1 cup boiling water
SALTED CARAMEL:
4 tablespoons water
1 cup sugar
2 tablespoons light corn syrup
1/2 cup heavy cream
2 tablespoons butter
1/2 teaspoon lemon juice
1/2 teaspoon salt, kosher or sea
FROSTING:
2 sticks butter
8 ounces or 1 package of Philly cream cheese
5 to 6 cups powdered sugar
1 cup salted caramel (recipe above)
Directions:
CAKE:
1. Heat oven to 350°F. Grease and flour two 9-inch round baking pans.
2. Stir together sugar, flour, cocoa, baking powder, baking soda and salt in large bowl. Add eggs, milk, oil and vanilla; beat on medium speed of mixer 2 minutes. Stir in boiling water (batter will be thin). Pour batter into prepared pans.
3. Bake 30 to 35 minutes or until wooden pick inserted in center comes out clean. Cool 10 minutes; remove from pans to wire racks. Cool completely before frosting.
SALTED CARAMEL:
1. Combine the water, sugar, and the corn syrup in a deep saucepan and cook over medium heat. Stir together with a wooden spoon until the sugar is incorporated. Cover the saucepan and let it cook over medium heat for 3 minutes.
2. After 3 minutes, remove the lid, increase the heat to medium-high, and bring to a boil. Do not stir from this point on, but it is important to carefully shake the pan so that one area of the caramel doesn’t burn. Continue to cook until the caramel turns an even amber color then remove from the heat and let stand for about 30 seconds.
3. *** This is the dangerous part *** Pour the heavy cream into the mixture. Wear oven mitts, stand away from the pan, and be careful. The mixture will bubble up significantly. Stir the mixture, again being careful. Add the butter, lemon juice, and salt. Stir until combined.
4. Measure 1 cup into a Pyrex measuring cup. Stirring occasionally, allow to cool until thick like molasses and warm to the touch, about 20 minutes.
This recipes makes slightly more than 1 cup of caramel. You can reserve the rest for drizzling, like I did if you wish, or just eat it with a spatula. Your preference. 😉
FROSTING:
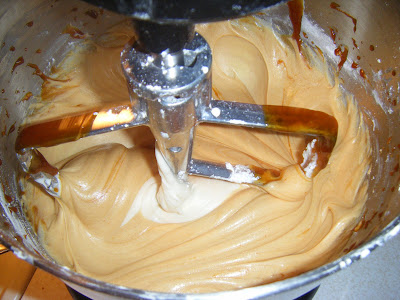
1. Bring butter to room temperature by letting it sit out for 1 or 2 hours. Beat butter and cream cheese at medium speed until creamy.
2. Sift 3 cups of powdered sugar into the butter/cream cheese mixture and beat to combine. Add 1 cup of the salted caramel and beat to combine. Sift 2-3 cups of powder sugar, in 1 cup increments and beating between each, until you arrive at the thickness and sweetness you desire. I used somewhere between 5-6 cups. The frosting wasn’t super thick, but it was starting to get pretty sweet.
3. Let frosting set up in the refrigerator before using. After frosting the cake, keep it in the refrigerator before serving for a prettier cake!
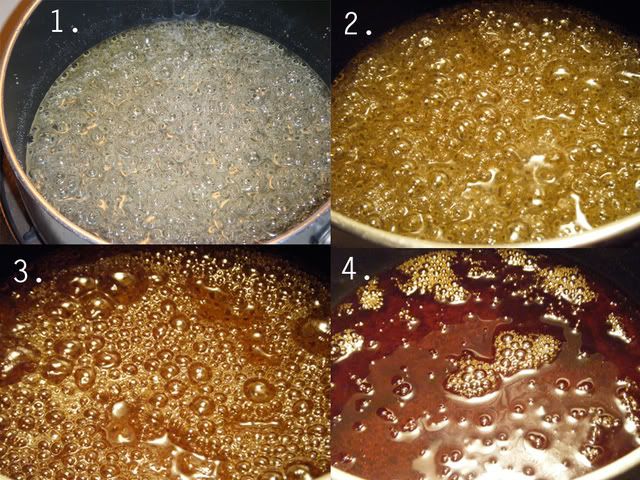
The stages of it turning to amber color. I let mine get to a pretty dark color amber to have a strong caramel flavor. Also, in my experience it will continue to cook, and get a little darker, even after you remove it from the heat, before adding the cream.
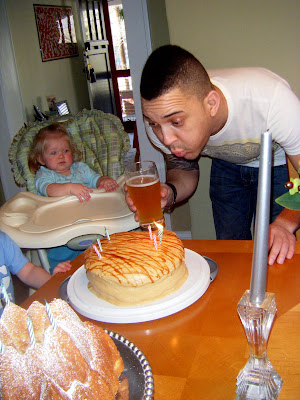
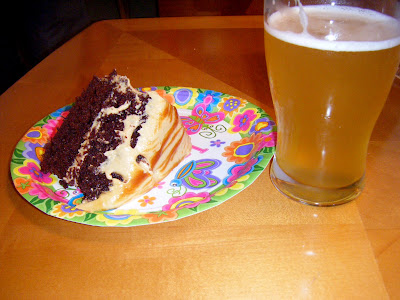
Apparently, this cake goes well with Yazoo Hefeweizen.
Friday, March 6, 2009
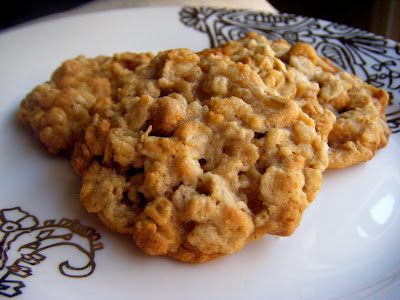
It had been a while since I made cookies, and so, taking advantage of my first three day weekend of my new work schedule, I made THREE batches of cookies! To make them all different flavors, this one I decided to do oatmeal with butterscotch chips. Don’t let the fact that these include oatmeal let you think they’re heathy. Believe me, they are not. But they are mighty delicious!
I decided to try the “Cindy McCain” recipe that her camp submitted for the First Lady Cookie recipe contest. As it turns out, this wasn’t exactly “her” recipe, but who cares, they were good cookies!
Print
Oatmeal Butterscotch Cookies
Good Housekeeping, as seen on Baking Bites
Makes 4-dozen cookies.
Ingredients:
3/4 cup butter, softened
3/4 cup sugar
3/4 cup brown sugar
2 large eggs
1 tsp vanilla extract
1 1/4 cups all-purpose flour
1 tsp baking soda
1/2 tsp ground cinnamon
3/4 tsp salt
3 cups rolled oats
1 1/2 cups butterscotch chips
Directions:
Preheat oven to 375F. Line a baking pan with parchment paper.
In a large bowl, cream together butter and sugars. Blend in eggs and vanilla until mixture is smooth.
In a medium bowl, whisk together flour, baking soda, cinnamon and salt. Stir into butter mixture, then mix in the oats and butterscotch chips.
Drop rounded tablespoonfuls (large balls) of cookie down onto the prepared baking sheets, leaving about 2 inches between each cookie to allow for spread.
Bake for 10-11 minutes, until the edges begin to brown. Let cookies cool on the baking sheet for about 5 minutes, then transfer to a wire rack to cool completely before storing in an airtight container.
Thursday, March 5, 2009
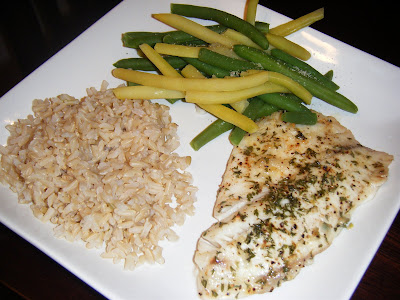
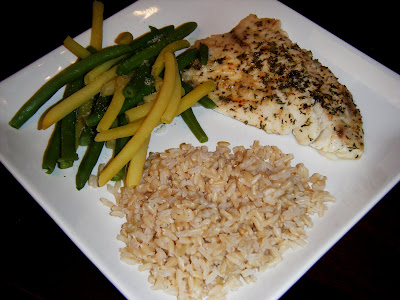
Ladies and Gentlemen… tonight’s meal has been brought to you by… The Boy!
I was so proud to come home knowing it was The Boy’s night to cook, and to see a recipe pulled up on the computer, and a yummy meal being completed in the kitchen. The only instructions I gave him were: “Cook tilapia, use whatever we have already in the house.” And TA-DA…
Print
Lemon Garlic Tilapia
Ingredients:
4 tilapia fillets
3 tablespoons fresh lemon juice
1 tablespoon butter, melted
1 clove garlic, finely chopped
1 teaspoon dried parsley flakes
pepper to taste
Directions:
Preheat oven to 375 degrees F (190 degrees C). Spray a baking dish with non-stick cooking spray.
Rinse tilapia fillets under cool water, and pat dry with paper towels.
Place fillets in baking dish. Pour lemon juice over fillets, then drizzle butter on top. Sprinkle with garlic, parsley, and pepper.
Bake in preheated oven until the fish is white and flakes when pulled apart with a fork, about 30 minutes.
And done on the eve of his 35th birthday too!


