Wednesday, August 19, 2009
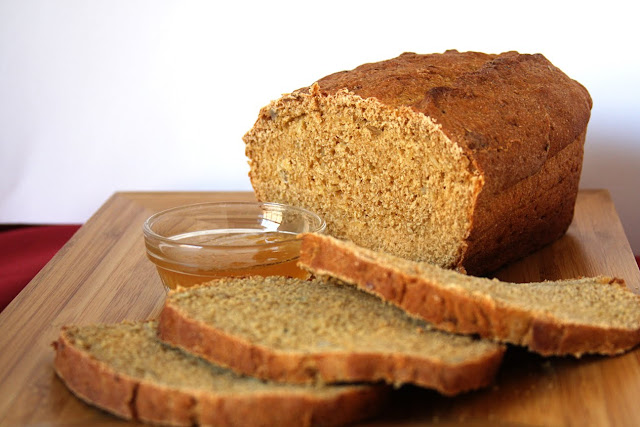
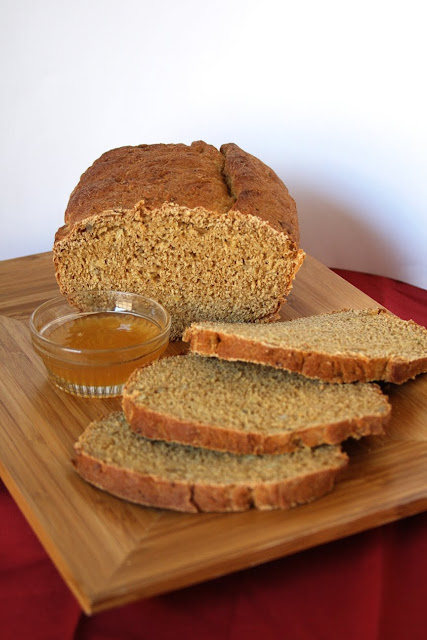
Who doesn’t love bread? I know I do. And the only thing that makes it better, is if it’s FRESH homemade bread. With my first loaf of homemade bread, I don’t know if he just wasn’t in a sandwich mood or what, but The Boy didn’t eat any of it! I thought it was great, and managed to eat most of it, and freeze the rest to use as toast with breakfast. But this bread, I’m proud to say, “The Boy Approves”. In fact, he told me multiple times how good it was! (Though probably not as many times as I proclaimed it’s greatness.)
I love that this recipe ONLY uses whole wheat flour. If you’ve never used WHITE whole wheat flour, it is less “nutty” flavored than regular whole wheat flour. I did a lot of searching before I landed on this specific recipe. A lot them called for ingredients I’d never heard of, and definitely didn’t have on hand. But as long as you’ve got the yeast, you’ve most likely got everything needed for this recipe.
The recipe calls for 5 Tablespoons of either honey, molasses, or maple syrup. At the time, I only had a little bit of honey, a little bit of molasses, and a lot of maple syrup. Flavor-wise I was more inclined to a honey or molasses flavor than I was maple syrup. So, I used 2 Tablespoons honey, 2 Tablespoons molasses, and 1 Tablespoon maple syrup. I only did this because I’m a total weirdo I wanted to use up the ingredients I had. As a tip, if you measure out and add the oil first, the honey (or molasses or syrup) will slide right off the measuring spoon.
Also, the recipe called for 1/4 cup sunflower seeds, and a 1/4 cup walnuts. I decided instead of the walnuts, I’d chop up pepitas (pumpkin seeds). I think, that while this bread would still taste great without the sunflower seeds or pepitas, they definitely stepped it up in both flavor and texture. The seeds made this bread taste a lot like the expensive healthy bread I sometimes buy at the store, but for a fraction of the price. You could skip this, but I really think it’s one of the best parts.
I don’t know if you can tell or not, but this bread was actually very moist & soft! I could definitely taste the essence of the honey & molasses. It makes yummy sandwiches and really great toast. Especially if you’ve got some of my grandma’s apple jelly to slather on it!!
I urge you, if you’ve toyed with the idea of making homemade bread, but haven’t taken the plunge, try this out. Especially if you have a Kitchen Aid mixer. It was so easy to whip up. Even if you don’t have a stand mixer, this is still a simple, straightforward recipe, you could easily knead by hand. And it’s whole wheat!


Print
Honey White Whole Wheat Sandwich Bread
Ingredients:
1 1/2 cups (12 ounces) lukewarm water
3 tablespoons olive oil
5 tablespoons honey, molasses or maple syrup
3 1/2 cups King Arthur Organic Whole Wheat Flour
1 tablespoon King Arthur Whole-Grain Bread Improver, optional
1/4 cup sunflower seeds, chopped*
1/4 cup walnuts, chopped* (I subbed 1/4 cup pepitas)
1 1/2 teaspoons salt
1 1/2 teaspoons instant yeast
*A quick whirl in the food processor does the job nicely.
Directions:
To prepare the dough: Combine all of the ingredients, and mix them till you have a shaggy dough. Let the dough rest, covered, for 20 minutes, then knead till fairly smooth. Allow the dough to rise, covered, for 1 to 2 hours, or until it's puffy and nearly doubled in bulk.
Gently deflate the dough, shape it into a log (like this), and place it in a lightly greased 8 1/2 x 4 1/2-inch bread pan. Cover the pan with a proof cover or lightly greased plastic wrap, and allow it to rise for about 1 hour, till it's crowned about 1 inch over the rim of the pan.
Bake the bread in a preheated 350°F oven for 45 minutes, tenting it lightly with aluminum foil for the final 20 minutes of baking.
Tuesday, August 18, 2009
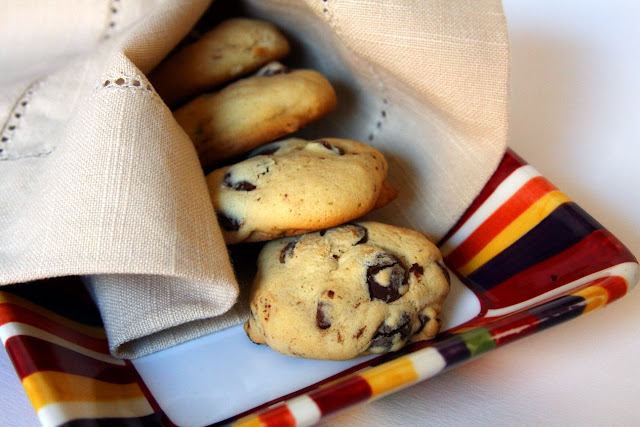
Who doesn’t love a good chocolate chip cookie? I have a recipe that I love love love, this one (pictures are awful; but cookies are awesome). And I’ve tried Alton Brown’s “The Chewy”, you can see and get my opinions here. But I have Martha Stewart’s Cookies book, that I’m pretty much obsessed with. That book, has FOUR chocolate chip cookie recipes. I figured it was about time I gave one of them a shot. I chose the one the book describes as Soft & Chewy. These were great cookies. They tasted delicious. They looked pretty. They were just… a little more cakey than The Boy & I prefer. I find this funny, because this book has a cakey chocolate chip cookie recipe, and it’s not this one!
I’m not sure I’ll make these again. But that’s not to say this wasn’t a great cookie. As I said before, it was really yummy. But it was puffy! I don’t post recipes I don’t endorse, so don’t get me wrong, just because this wasn’t my favorite chocolate chip cookie, doesn’t mean I don’t think someone else will love it. So, if you’re looking for a pretty looking, and great tasting chocolate chip cookie, that’s puffy and cake-like, try this one! It’s called “Soft & Chewy”. This leads me to wonder, maybe I did something wrong when following the recipe. Please let me know if anyone else made this recipe, and got the same results.

Print
Soft & Chewy Chocolate Chip Cookies
Ingredients:
2 1/4 cups all-purpose flour
1/2 teaspoon baking soda
1 cup (2 sticks) unsalted butter, room temperature
1/2 cup granulated sugar
1 cup packed light-brown sugar
1 teaspoon salt
2 teaspoons pure vanilla extract
2 large eggs
2 cups (about 12 ounces) semisweet and/or milk chocolate chips
Directions:
Preheat oven to 350 degrees. In a small bowl, whisk together the flour and baking soda; set aside. In the bowl of an electric mixer fitted with the paddle attachment, combine the butter with both sugars; beat on medium speed until light and fluffy. Reduce speed to low; add the salt, vanilla, and eggs. Beat until well mixed, about 1 minute. Add flour mixture; mix until just combined. Stir in the chocolate chips.
Drop heaping tablespoon-size balls of dough about 2 inches apart on baking sheets lined with parchment paper.
**Bake until cookies are golden around the edges, but still soft in the center, 8 to 10 minutes. Remove from oven, and let cool on baking sheet 1 to 2 minutes. Transfer to a wire rack, and let cool completely. Store cookies in an airtight container at room temperature up to 1 week.
**With all chocolate chip cookies I bake now, I refrigerate the dough for at least 24 hours before baking**

Another fun part about making these cookies, is it was the first thing I’ve baked using the Mexican vanilla my friend Liesl got me, way back when she went on a Mexican Riveria cruise! I think when she gave it to me, I had just opened a new large bottle of vanilla. So, YAY for foodie friends!!! Thanks again Liesl!
Monday, August 17, 2009

There is an awesome festival The Boy & I like to go to every year, the East Nashville Tomato Art Festival. It’s in a really funky neighborhood, one we hope to live in someday. The festival began as a yearly art show in the gallery, celebrating the tomato, and grew into the all out festival with all the local business celebrating in their own tomato theme way. If you follow me on twitter you might remember my updates.
The night before the festival, I had some grouper I wanted to cook for dinner, and was scouring my fridge and the internet for ideas on what to make with it. I settled on this Cooking Light recipe. It was a great way to use ingredients I had on hand from my CSA box. I omitted the capers, because I didn’t have any, and we don’t really like them much anyway. This is a simple, easy dish to throw together, and the flavors are really refreshing, and perfect for this time of the year. The Boy really really liked it, and I think it helped get us even more excited for the fun we were going to have the next day.
Baked Grouper with Chunky Tomato Sauce
from Cooking Light
3 1/2 cups chopped seeded tomato (about 4 medium)
1/4 cup chopped green onions
1/4 cup dry white wine
1 tablespoon chopped fresh basil
1 teaspoon capers (I omitted)
1 teaspoon bottled minced garlic
1 teaspoon fresh lemon juice
1/2 teaspoon salt
1/4 teaspoon crushed red pepper
1/4 teaspoon black pepper
2 teaspoons olive oil
4 (6-ounce) grouper fillets
Preheat oven to 425°.
Combine first 10 ingredients in a medium bowl.
Heat oil in a large heavy skillet over high heat. Place fish, skin sides up, in pan; cook 2 minutes. Turn fish over; top with tomato mixture. Bring to a boil. Place pan in oven; bake at 425° for 8 minutes or until fish flakes easily when tested with a fork.
Calories: 200; Fat: 5.7g; Protein: 28g; Carbohydrate: 8.6g; Fiber: 2.2g; Cholesterol: 41mg Iron: 2mg; Sodium: 400mg; Calcium: 73mg

Thursday, August 13, 2009
 When our nephew came to visit, I planned on making ice cream and letting him pick the flavor. I’ll admit I was really hoping he would choose a flavor like chocolate. But he already knew about the strawberries in the fridge, as he’d been snacking on them. He loves fruit of all kind, so I was sure to have lots to choose from when he came to visit, including cherries, strawberries, blackberries, apples, and bananas.
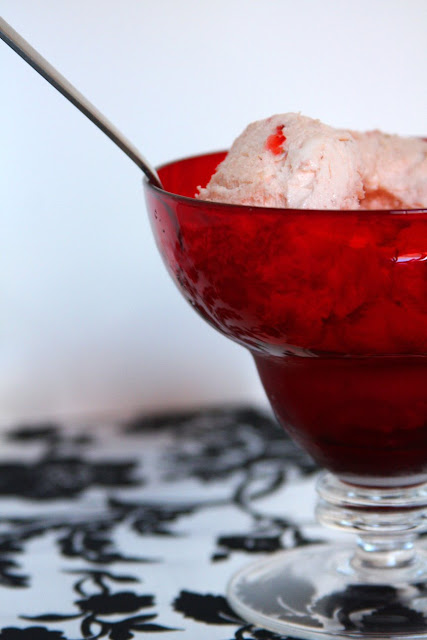
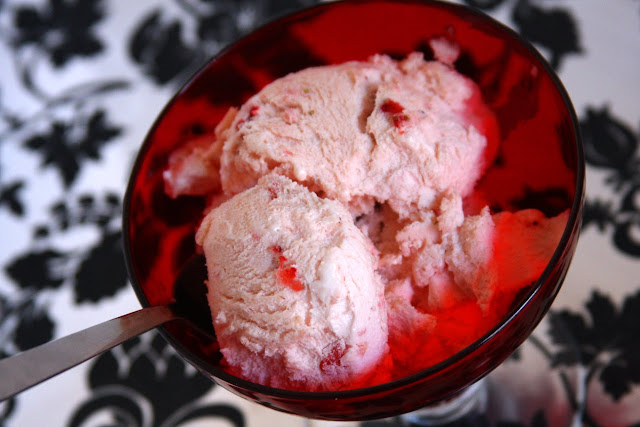
When discussing the ice cream, he instantly said “Strawberry!” Strawberry ice cream was what the Little Man wanted, and that’s what he would get! I just needed to decide on a recipe. I browsed a bunch of places, and finally decided on a recipe I saw on the website Recipezaar that claims to be like Ben & Jerry’s. This recipe was really interesting to me, because I’d never seen an ice cream recipe that included the egg whites. I’ll admit, I almost omitted them, but in the end went ahead and left them in. Once churned into creamy goodness, this ice cream tasted really delicious! I followed the advice of some of the reviewers, and pureed a portion of the strawberries. I think I pureed about 2/3 of them. The resulting color of the base (if your monitor is showing the colors properly) is a delicate pink color, with the bright little bits of strawberry interspersed throughout.
Now, this recipe says it’s supposed to taste like Ben & Jerry’s, but I don’t know I’ve ever had their strawberry, so I couldn’t tell you! (I’m more of a Phish Food & Cherry Garcia kinda gal.) But I do know it makes a great ice cream. I shared it with my coworkers and got LOTS of compliments! And, it tastes VERY delicious when scooped on top of a warm brownie.
Print
Strawberry Ice Cream
Ingredients:
1 pint fresh strawberries, hulled and chopped
1 tablespoon fresh lemon juice
2 large eggs
1 cup sugar, divided
2 cups heavy whipping cream
1 cup milk
1 teaspoon vanilla extract
Directions:
Combine strawberries, lemon juice, and 1/4 cup sugar in a mixing bowl, set aside in fridge for 1 hour.
Divide strawberries, and reserve 1/3 in the bowl as a mix-in, return to refrigerator. Puree remaining strawberries & juice until smooth.
In large mixing bowl beat eggs until light and fluffy, about 2 minutes.
Gradually add 3/4 cups sugar, mixing well. Stir in milk, vanilla, and strawberry puree; mix well. Gently stir in whipping cream just until combined.
Pour into ice cream maker and follow manufacturer's instruction. After churning, gently mix in reserved strawberries. Freeze a couple hours until firm.


